Polycor U
How to Build a Dry-Stack Stone Wall Using the Garden Wall System
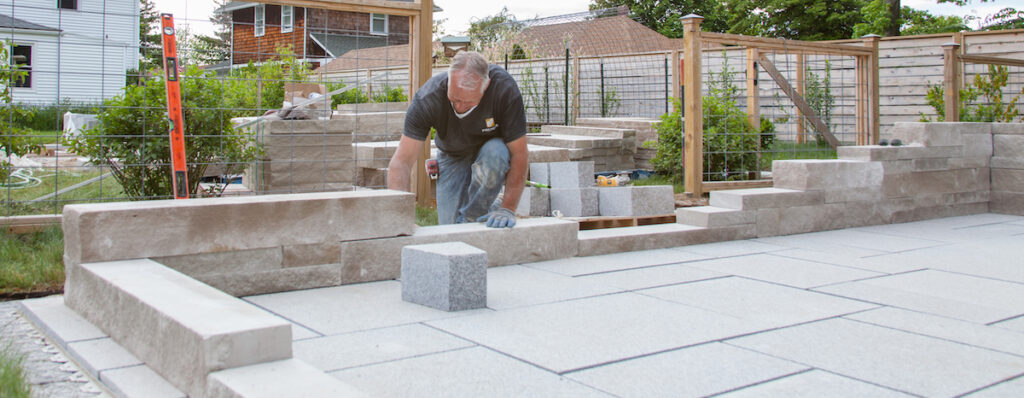
Elevate your hardscape design and create a lasting impression with natural stone garden walls. In this video, you will learn step-by-step how to install dry stacked walls using 6″ and 3″ Garden Wall products cut from thick slabs of pure Indiana Limestone.
Course Description
Dry stacked walls can be built in an infinite number of shapes and sizes using a wide range of natural stone types. In this video we demonstrate one option for building a dry stack wall using a double-sided wall product cut from solid blocks of Indiana Limestone – Full Color Blend.
Building Decorative Patio Walls with Natural Stone Garden Walls
Made by nature, there’s no better complement to outdoor living spaces than natural stone. Polycor’s historic North American quarries provide a range of stone products that help distinguish your creation from any other. Garden Walls in particular add depth to any space, ideal for shallow floral beds and landscaping elements that enhance rather than dominate your landscape design.
Among Polycor’s hardscape offerings, Garden Walls provide the perfect balance of visual impact and functional definition. These architectural features create intimate garden retreats and organized outdoor spaces while maintaining an open, welcoming atmosphere that invites relaxation and enjoyment.
Indiana Limestone Garden Walls: Built to Last
Garden Walls are made from solid blocks of Indiana Limestone Full Color Blend, quarried directly from Polycor’s renowned Indiana Limestone quarry. This legendary stone has been the material of choice for America’s most iconic buildings for over a century, bringing that same quality and character to residential landscaping projects.
What sets these blocks apart is their precision engineering. Each Garden Wall features a double-sided split-faced finish that provides natural texture on both front and back surfaces, making them perfect for freestanding applications where both sides will be visible. The blocks come in standard 3″ and 6″ heights by 8″ widths and random lengths, allowing for natural variation that distinguishes quality installations from manufactured alternatives.
The random length feature creates authentic-looking walls that appear crafted by skilled stonemasons rather than obviously manufactured products. This natural randomness, combined with limestone’s subtle color variations, ensures each installation is truly unique.
Foundation and Base Preparation
Typically, 6″ to 8″ of compacted aggregate base is required to provide a firm foundation for Garden Wall installations. This substantial base prevents settling, shifting, or frost heaving that could compromise your wall’s integrity over time.
However, modern installation methods offer efficient alternatives. In this project, we’re installing over existing granite pavers set on EZBase, a high-density foam panel that replaces traditional compacted aggregate-base installations, saving up to 8″ of excavation and reducing time and labor. The EZBase extends 12″ beyond the wall for added support while maintaining excellent drainage characteristics crucial for freeze-thaw performance.
When building over existing paving, this innovative approach allows you to enhance outdoor spaces without extensive excavation. For new installations without existing paving, compact and level the aggregate base meticulously for the first course of Garden Wall blocks.
Planning and Layout for Professional Results
Successful Garden Wall installation begins with careful planning and precise layout. Chalk guidelines to designate the first course of wall, establishing the reference point for your entire installation. For decorative patio walls, maintaining consistent relationships with existing hardscape elements creates visual harmony.
In this courtyard application, coming in 4″ from the outside edge of pavers helped keep the wall square while creating the intimate, enclosed feeling that makes outdoor spaces so appealing. This precise spacing ensures the new wall integrates seamlessly with existing landscape elements rather than appearing as an afterthought.
Creative Design Through Block Arrangement
One of the most satisfying aspects of working with Garden Wall blocks is the creative freedom they provide. Arrange the blocks according to your design vision. In this case, smaller pieces are mixed with longer lengths and differing heights for a more random appearance that mimics traditional dry-stacked stone walls while maintaining modern construction precision.
The key to successful random arrangements is avoiding obvious patterns while maintaining overall visual balance. Step back frequently during layout to assess the developing composition, ensuring similar-sized blocks don’t cluster together in ways that look forced or artificial.
Essential Installation Techniques
Begin by damp-proofing the bottom of the first course of blocks only – no other damp-proofing is necessary. This moisture barrier prevents capillary action from drawing ground moisture into the limestone, protecting against freeze-thaw damage. Mix the damp-proofing according to manufacturer recommendations and apply only to blocks that will contact the foundation.
Start dry-fitting pieces, offsetting vertical and horizontal joints when possible for better aesthetics and superior structural strength. This running bond pattern distributes loads across multiple blocks rather than creating continuous weak points.
Use split-faced short sides to match the face at wall ends where installation quality is most visible. Some ends will arrive pre-split while others will require mechanical splitting either with a chisel or hydraulic splitter, which is recommended for consistent results.
Make any necessary adjustments to length or height using a grinder with diamond blade and cup wheel. Take time with these modifications – poorly cut blocks are immediately obvious and detract from overall installation quality.
Advanced Adhesive Technology
After dry laying a series of blocks, begin gluing in place using Structure Bond polyurethane adhesive, a super-strength foam adhesive that replaces traditional glue, bonding blocks in just 8 minutes. This advanced adhesive system far exceeds traditional mortar performance while offering significant installation advantages.
The fast curing time allows installation to proceed rapidly without extended waiting periods, while reducing the risk of blocks shifting during installation. Apply according to manufacturer recommendations, ensuring complete coverage while avoiding excess that could squeeze out and compromise the finished appearance.
Professional Finishing with Wall Caps
Once desired height is achieved, finish the wall design with 2″ thick 12×24 wall caps with natural split-face edges. These limestone pieces provide both practical protection and aesthetic completion, shedding water away from the wall structure while creating the substantial, finished appearance that marks professional-quality work.
Dry lay the caps first, keeping an equal overhang on both sides – typically 2″ for balanced proportions and maximum weather protection. Run a string line to the finished height of the wall to use as a guide and help maintain straightness throughout the cap installation.
When satisfied with the cap layout, continue the glue-up process with foam adhesive. Work methodically to maintain the precise alignment established during dry-fitting, as repositioning becomes difficult once the fast-curing adhesive begins to set.
The Lasting Value Investment
Garden Walls constructed with Polycor’s Indiana Limestone represent investments in lasting beauty and functionality that will enhance outdoor living spaces for decades. Unlike manufactured alternatives that may fade or become dated, natural limestone actually improves with age, developing rich patina that enhances character while maintaining structural integrity.
The neutral tones and organic texture of Indiana Limestone complement virtually any architectural style or landscape design, ensuring your Garden Wall installation remains appropriate and attractive regardless of how your outdoor space evolves. This timeless quality, combined with limestone’s exceptional durability, makes Garden Walls one of the most cost-effective improvements you can make to your outdoor environment.


