Polycor U
Cleaning, Sealing & Repairs of Natural Stone Surfaces
Keep your natural stone installation looking great for generations to come, learn all there is to know about preserving stone surfaces.
From choosing the right cleaner, applying sealer, and understanding what type of surface each product is suitable for, this course walks you through the steps of cleaning, sealing and repairing natural stone hardscapes and masonry products so that they last for years to come. Aside from natural stone’s long-lasting durability and aesthetic appeal, it is also one of the most user-friendly materials to maintain. Polycor stone specialists have amassed their collective knowledge, from decades of working on every type of project and application, to bring you the most valuable information to help you preserve your installations for generations to come.
Course Description
Stone surfaces add a timeless beauty to any home, but they require special care to keep them looking their best for years. Learn how to clean, seal and repair even the toughest stone surfaces with this straightforward Polycor U course!
We’ll show you key tips including:
- cleaning and maintenance procedures
- which sealers are best for natural stone
- how to remove stains
- how to repair or replace damaged stone
- which products are recommended and best suited for natural stone
Unlock the secrets of maintaining your natural stones so they stay beautiful – watch now!
How to Clean, Seal, and Repair Pavers: The Complete Guide to Natural Stone Care
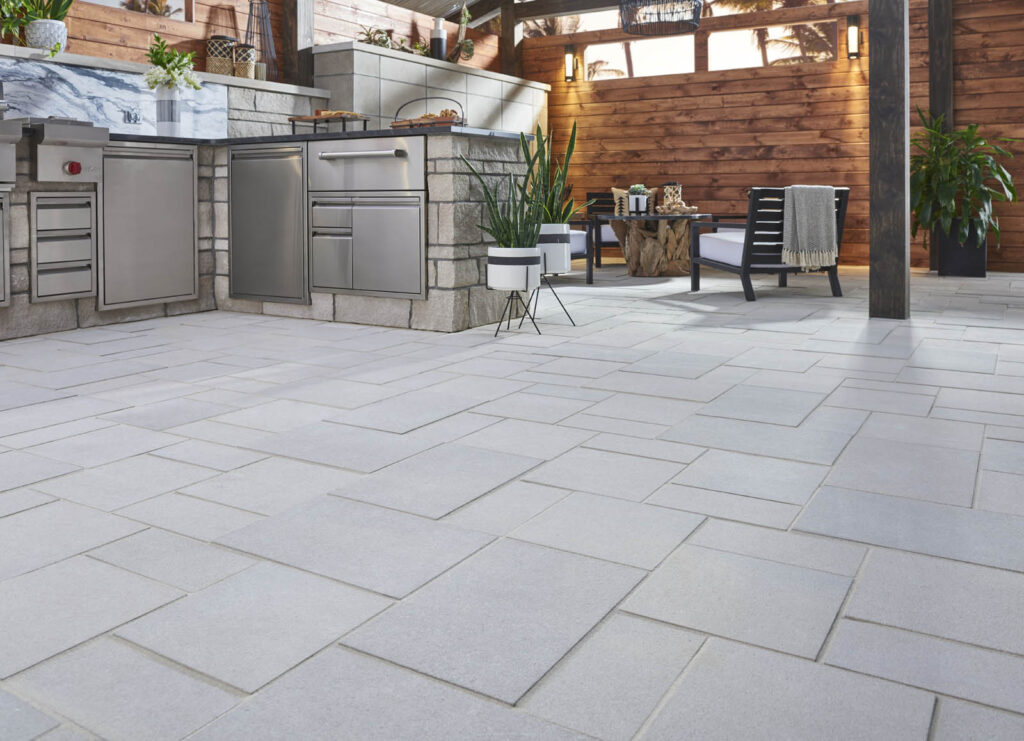
Natural stone hardscapes represent a significant investment in your property’s beauty and value. Whether you’ve installed limestone pavers, granite steps, or marble pool coping, proper care ensures these materials will maintain their stunning appearance for generations. Understanding how to clean, seal, and repair natural stone isn’t just about preservation—it’s about maximizing the return on your investment while keeping your outdoor spaces looking their absolute best.
Whether you’re learning how to clean patio pavers for the first time or looking for the best way to clean pavers, this guide covers pressure washing pavers, sealing patio pavers, and paver repair techniques.
Professional stonemasons have developed proven techniques over decades of working with these materials. By following their methods and using the right products, you can maintain your stone installations with confidence, avoiding costly mistakes that could damage these beautiful natural materials.
Understanding Your Stone Before You Begin
Every type of natural stone has unique characteristics that affect how it should be maintained. Limestone, being calcium carbonate based, requires gentler treatment than the incredibly durable granite. Marble falls somewhere between these extremes, offering beauty that demands respect for its composition. Before applying any cleaning or sealing product, always test it on an inconspicuous area or a spare piece of the same stone to ensure compatibility.
The golden rule of stone care is “less is more.” Begin with the gentlest approach and progress to the next stage using stronger solutions only if necessary. This philosophy protects your investment while achieving the results you want.
How to Clean Patio Pavers: The Foundation of Proper Care
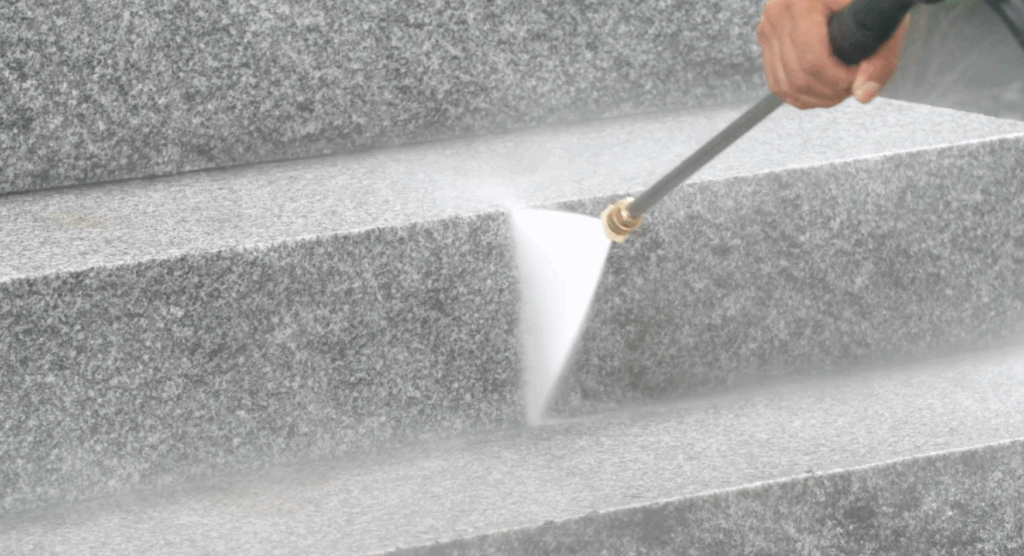
Pressure Washing Pavers: Your First Line of Defense
High-pressure water cleaning pavers serves as the preferred starting point for most paver cleaning projects, making it the best way to clean pavers for routine maintenance. However, the pressure settings must be adjusted based on your stone type. Limestone requires the gentlest approach, typically using pressure less than 1,200 PSI, while granite and marble can withstand significantly higher pressure without damage.
This pressure washing pavers technique works equally well for granite pavers, where the stone’s density allows for effective cleaning without damage. Use a 45-degree fan-shaped nozzle held approximately 6 inches from the stone surface. Work in slow passes from side to side, always moving from top to bottom. Granite’s incredible density allows for concentrated pressure without adverse effects.
Limestone demands much more careful attention during pressure washing. Keep the pressure as light as possible and maintain at least 6 inches distance from the surface. Never concentrate on a single spot for extended periods—keep the nozzle moving continuously side-to-side in order to prevent potential damage. When cleaning Indiana Limestone wall caps that have mildew staining, use methodical passes edge-to-edge in an even and consistent pattern.
When Water Isn’t Enough
Stubborn stains may require additional help before pressure washing. A few tablespoons of mild detergent like Dawn dish liquid mixed in a bucket of water, combined with scrubbing using a stiff nylon brush, can loosen challenging stains. Follow this pre-treatment with another pass using the pressure washer for optimal results.
Specialized Cleaning Products
Some paver cleaning situations require specially formulated products, especially when learning how to clean patio pavers with stubborn stains. Before using any commercial cleaning agent, remember that limestone’s calcium-based composition can react poorly with high pH cleaners or acidic solutions containing vinegar or other acids. Always read product labels carefully and conduct test applications first.
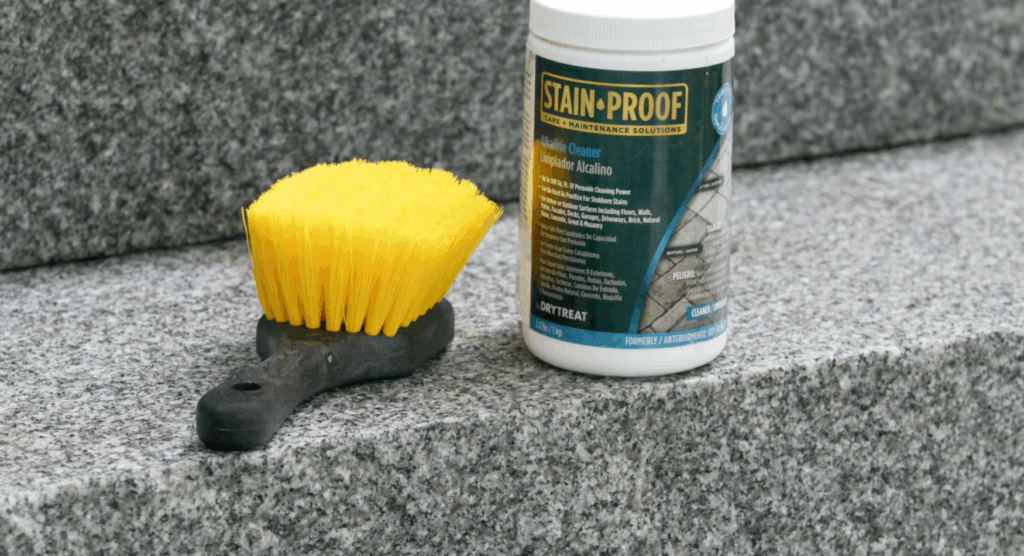
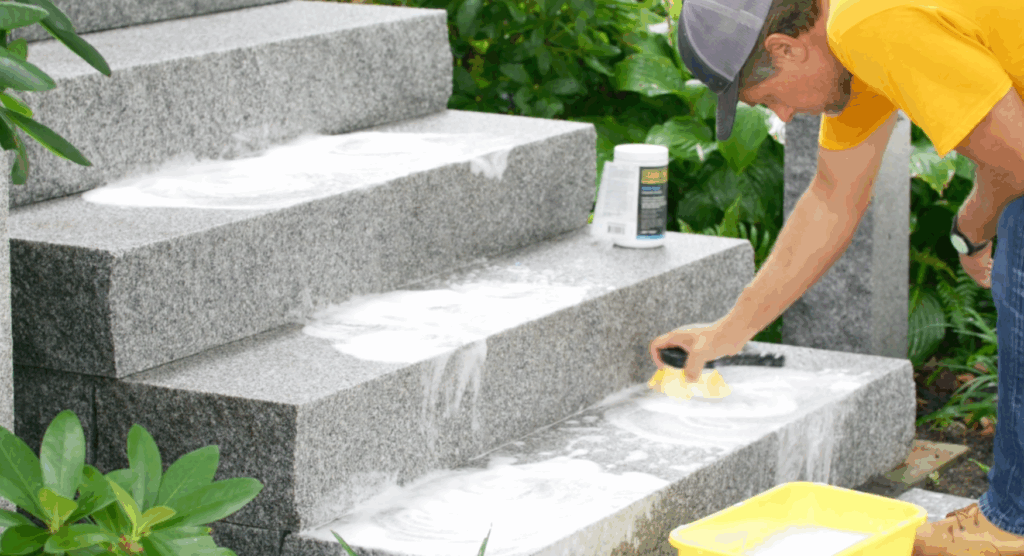
OxyKlenza also known as Alkaline Cleaner, provides an excellent pH-neutral solution that’s particularly effective on leaf stains and other organic stains. This powdered product mixes with water according to the manufacturer’s instructions. Scrub the solution into the stone with a stiff nylon brush and allow several minutes for penetration below the stone surface. Rinse with clean water, evaluate results, and repeat as necessary.
Sure Klean Limestone Restorer by Prosoco offers another excellent option for limestone maintenance, effectively removing atmospheric dirt, mildew, and more from moderately dirty surfaces. Mix the concentrate with water at ratios ranging from 2:1 to 6:1 water to concentrate, depending on soil severity. Apply using a pump sprayer, working from bottom to top in small sections to keep surfaces moist. Allow the solution to sit for 3-5 minutes before applying a second coat. Light agitation improves results. Finally, rinse thoroughly with clean water using a garden hose nozzle with a tight stream, working from bottom to top.
Stain Removal: Addressing Specific Challenges
Occasional stains from oil, food, or beverages require specialized stain removal procedures. Poultices provide an effective solution for removing stubborn stains from within the stone’s porous structure and DIY friendly.
Using Powdered Poultices
Traditional poultices consist of fine, non-acidic, absorptive clay cleaning powder made from ingredients like diatomaceous earth and fuller’s earth. It can come pre-mixed or dry. Mix the powder with just enough water to achieve a thick, peanut butter consistency, then spread a ¼-inch thick layer over the stain. Cover with plastic sheeting and tape the edges to create a vacuum effect that pulls the stain upward into the poultice material as the paver tries to breathe and draws moisture and vapor up through the stone. Allow several hours for the process to work, then remove the plastic and wipe away the dried material. Repeat as necessary for complete stain removal. It may take several attempts to get the desired effect.
Pre-Mixed Convenience
Products like Bellinzoni’s Spot Remover offer simple, effective stain removal without the need for a mixing process. Apply a layer of the pre-mixed poultice using the same procedures as those for powdered versions for convenient stain treatment. This product has a proprietary blend of ingredients and exact ratios of moisture to powder, ready to go out of the jar. Remember to screw the lid on tightly when finished to preserve the product.
Rust Stain Solutions
Rust stains require specialized treatment using products like Azpects Easy4Rust stain remover, a pH-neutral, non-acidic solution. After ensuring the stained area is completely dry, pour the solution onto the rust stain and allow it to penetrate the iron oxide spots. The solution changes from clear to purple as it begins to react with the rust. Lighter stains require about 10 minutes, while heavier stains may need up to 2 hours. Keep the area wet during treatment, then rinse thoroughly with water when complete to wash away the residue. Blow dry and inspect the results and repeat if needed.
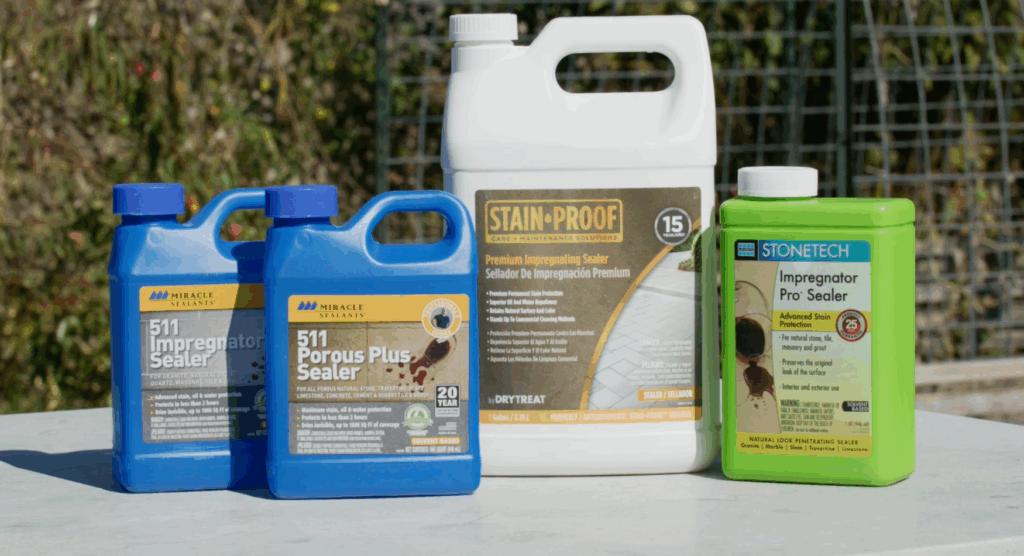
How To Seal Pavers: Protection That Preserves
Proper sealing protects your stone investment while maintaining its natural appearance. Select sealers specifically designed for outdoor hardscape applications, as these provide optimal protection against weather and wear.
Selecting the Right Sealer
The ideal paver sealer preserves your stone’s natural appearance without enhancement or darkening. Impregnating sealers prove superior to topical, film-forming alternatives that create artificial surface layers prone to discoloration, cloudiness, and flaking over time. Beware of products that say “wet look” or “high gloss” as those are typically topical only and will suffocate the stone. Stone needs to breathe and requires air to pass through it. Blocking the surface will harm the stone when using these film-forming sealers. Premium impregnating sealers, particularly solvent-based formulations, penetrate deep into the stone to form strong, protective barriers that lie below the surface, but still allow air to pass through it.
Next, lay 1-inch diameter pipes onto this base and check that they’re level in both directions. These pipes will serve as guides for screeding your final setting bed. Fill around the pipes with ⅜” clean, angular stone slightly higher than the pipe tops. Using a straight board, screed this material to create a perfectly level surface, removing the pipes afterward and filling any resulting voids.
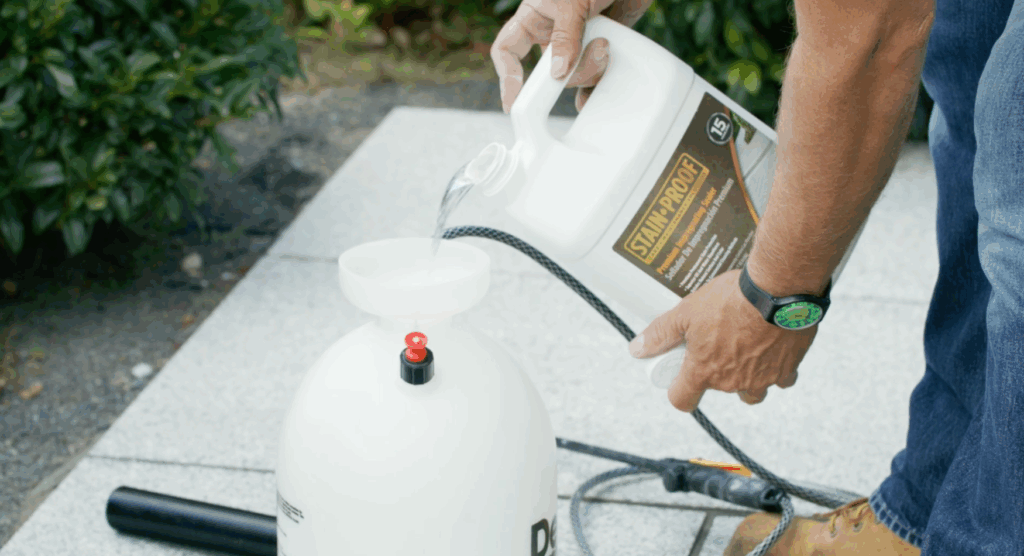
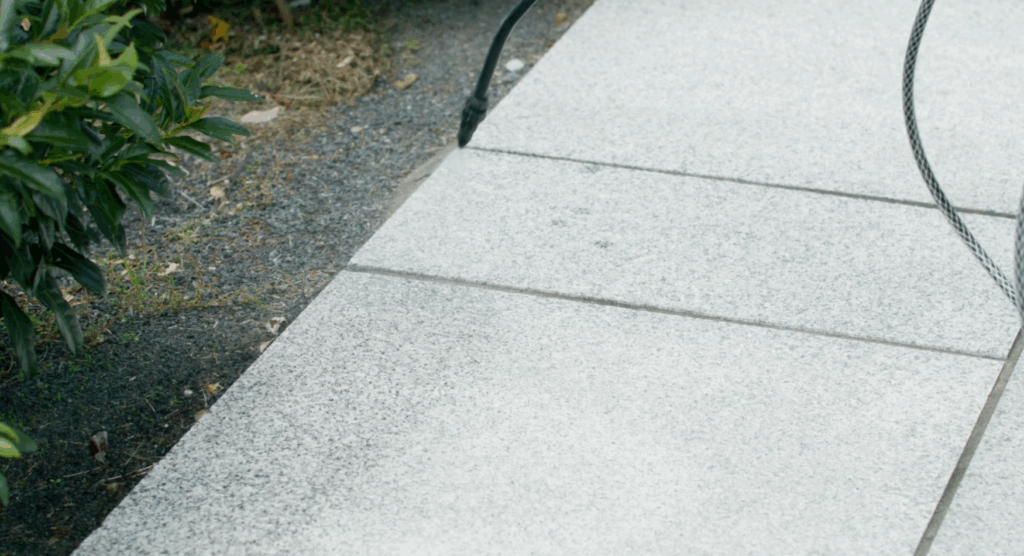
Application Process
Sealing patio pavers requires clean, dry surfaces for optimal results. For new installations, blow the surface dry and remove any installation residue. Existing installations should be cleaned with mild detergent and water, then allowed to dry thoroughly before sealer application.
Pump sprayers provide the most even coating of sealer during an application, though medium nap rollers can work for smaller areas. Using a sprayer with a 45-degree nozzle, hold it approximately 6 inches from the surface and apply the sealer in even passes. Allow several minutes for penetration while avoiding excessive puddling. Let the sealer dry completely before using the surface.
Reapply paver sealer every 4-5 years to maintain optimal protection and keep your hardscapes looking like new installations. This pavers sealing schedule ensures continued performance.
Paver Repair: Restoring Stone
Natural stone’s exceptional durability occasionally requires minor repairs to maintain a perfect appearance. Several materials and methods can effectively restore stone to its original condition.
Limestone Surface Repairs
A-1 Stone Patcher offers an excellent paver repair solution for limestone chip repairs, being specifically formulated for Indiana Limestone and actually manufactured from Indiana Limestone itself. This dry powder product requires only water activation for use.
Clean and dry the repair area thoroughly, then tape off surrounding areas to protect them during the repair process. Mix A-1 Stone Patcher with water in either Buff or Standard Gray color, or combine both to achieve the desired color match. Apply using a putty knife or single-edged razor blade, screed flat, and leave slightly proud of the surface. After drying, use a variable-speed grinder set at low speed with 220-grit silicon carbide sandpaper to lightly sand and match the surrounding factory finish.

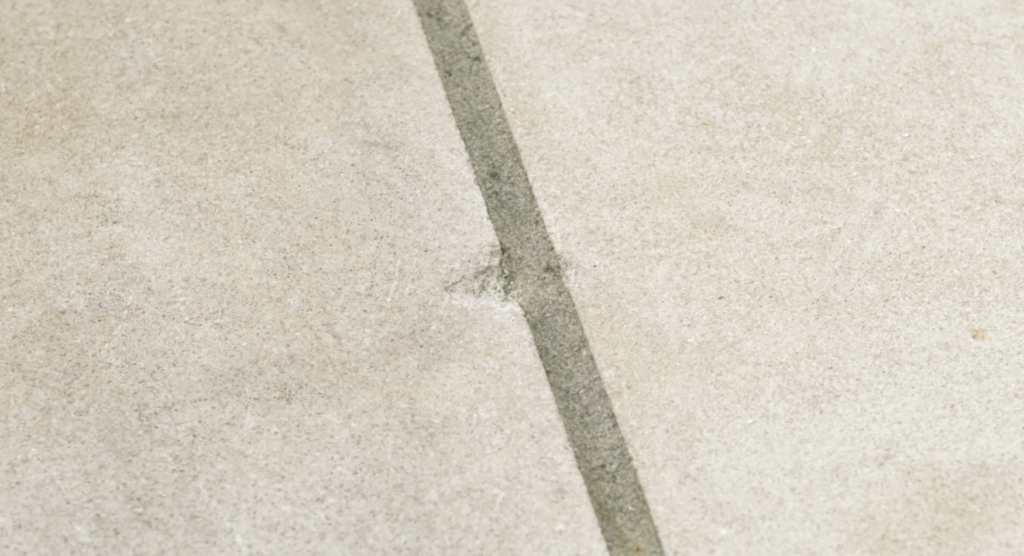
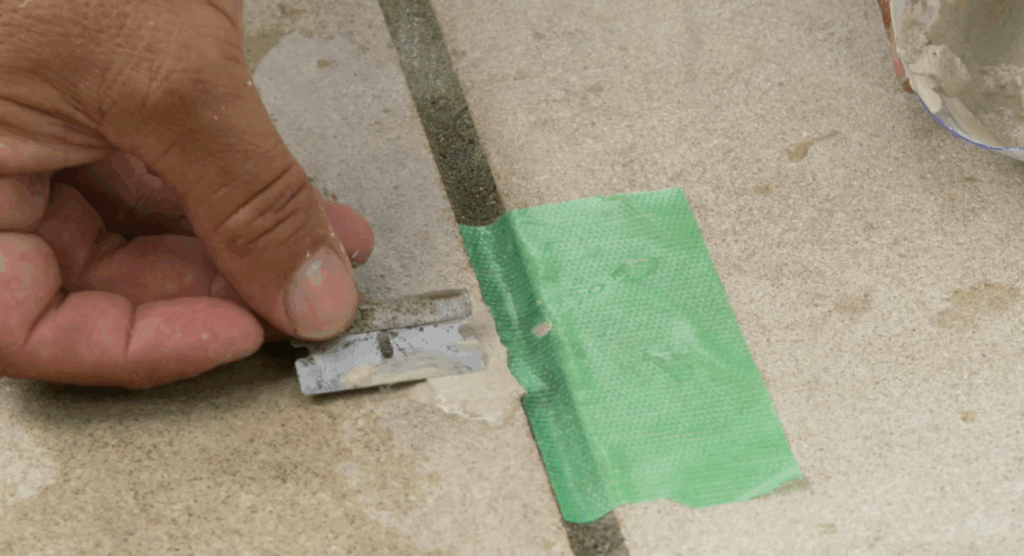
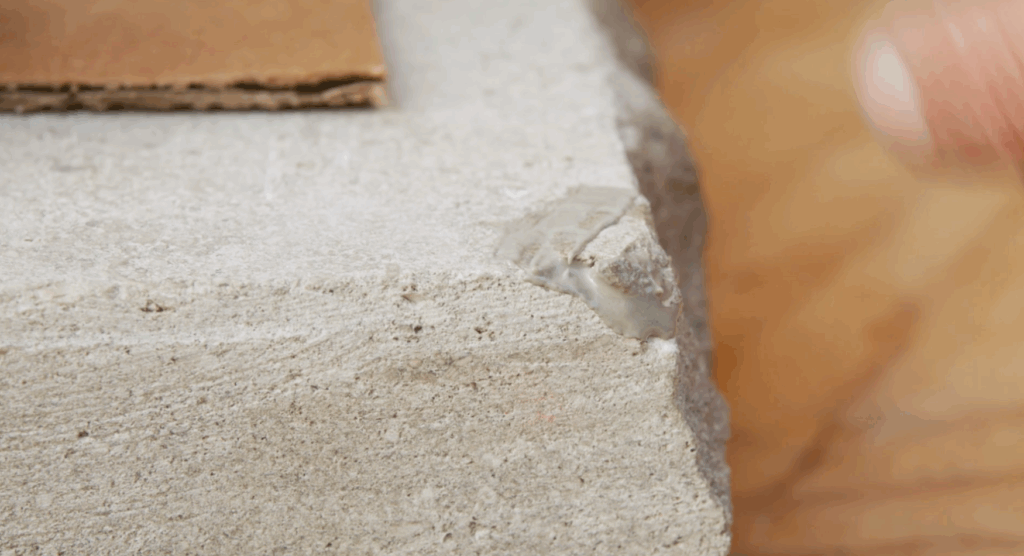
Edge and Corner Chip Repairs
When corner or edge chips occur during paver repair projects, first search for the broken piece, as it can often be reattached successfully. Various polyester or epoxy resins allow color matching using liquid color tints. Test-fit the chip, then mix knife-grade resin with appropriate colors—combinations of yellow, white, black, and brown typically match limestone well.
Add paste hardener (about a pea-sized amount to a golf ball-sized portion of resin) and mix thoroughly. Apply layers to both the chip’s back surface and the stone, then set the piece in place. Allow the resin to cure completely (a heat gun can accelerate curing but shouldn’t be held too close to the surface). Once cured, lightly sand with 220-grit sandpaper at low speed to blend with surrounding areas.
Alternative Repair Solutions
When the original chip piece isn’t available, Bonstone Last Patch provides an excellent alternative. This premixed, non-yellowing urethane product contains Indiana Limestone granules for authentic texture matching. Mix the paste hardener in a 7:1 ratio with the patch material, then apply carefully using a single-edge razor blade. Allow complete curing before sanding smooth with 220-grit sandpaper.
Maintaining Your Investment for Generations
Proper care of natural stone hardscapes isn’t just about immediate appearance—it’s about preserving these materials for decades of enjoyment. By following professional techniques for cleaning, sealing, and repairing, you ensure your stone installations continue adding value and beauty to your property.
Remember that technology and products continue evolving in the stone care industry. When in doubt, contact manufacturers directly for the most current recommendations and application techniques. Your natural stone installation represents craftsmanship that has endured for centuries, and with proper care, it will continue that tradition in your outdoor living space.
Ready to give your natural stone hardscape the professional care it deserves? Whether you need guidance on paver cleaning and sealing or specific maintenance techniques, contact a Polycor expert today to discuss the best maintenance approach for your specific stone installation and ensure it remains beautiful for generations to come.


