Polycor U
Mortar Alternatives: Installing a Marble Thin Veneer BBQ
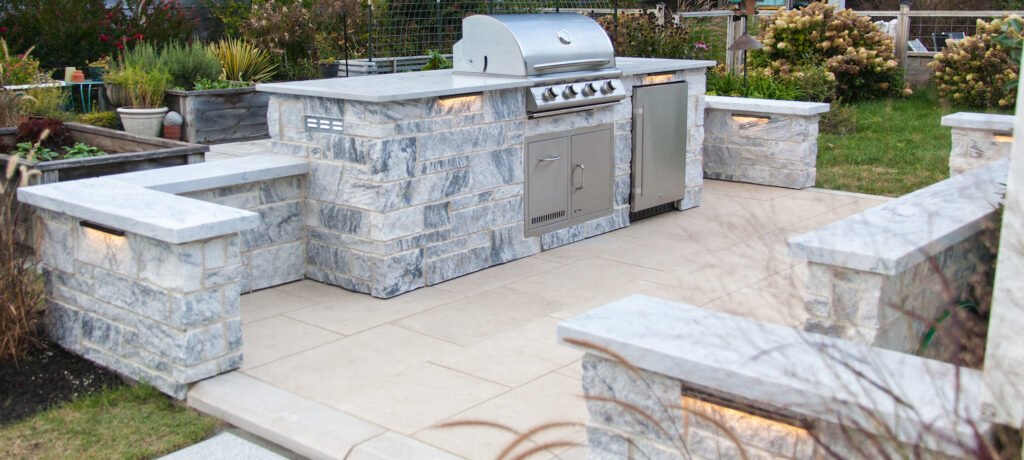
Whether you want a freestanding pizza oven, a built-in BBQ island, or a full outdoor kitchen with counters, and bar seating, natural thin stone veneers can help create a first-rate outdoor space. And marble veneers especially provide a striking vein pattern and light tonality that are both unique and one-of-a-kind.
Course Description
In this video, we show you how to install Berkshire split face thin veneer cut from Georgia Marble – Pearl Grey. We install the veneer on two common substrates found in most typical outdoor kitchens, both CMU block and cement board. Utilizing a mortar alternative, versus the traditional portland cement-based mortars, increases both speed and productivity.
Transform Your Outdoor Kitchen with Berkshire Thin Veneer
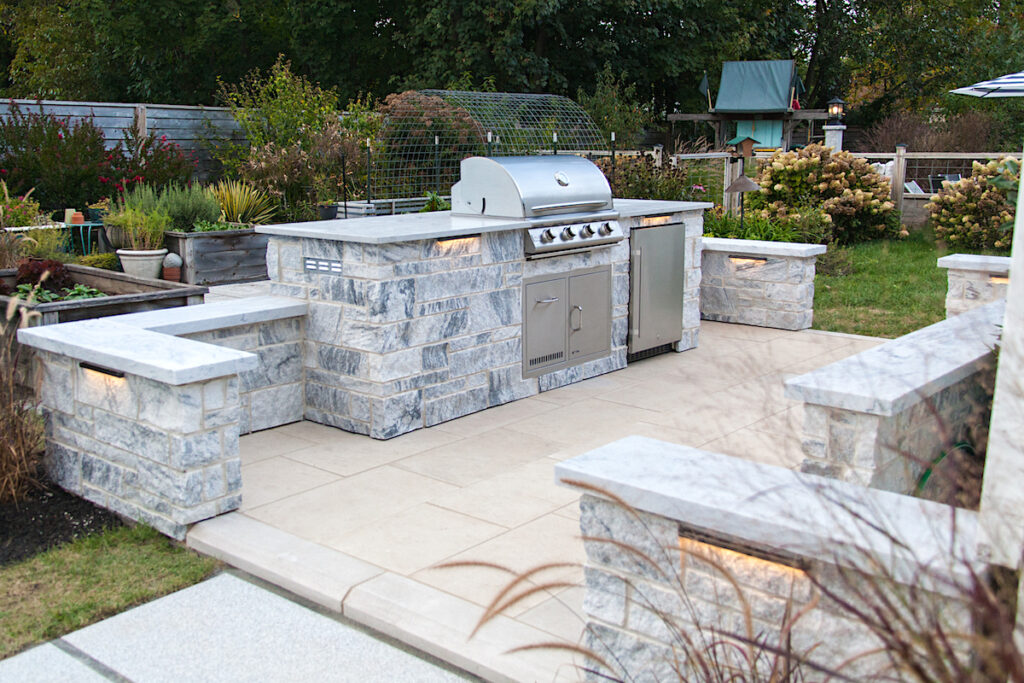
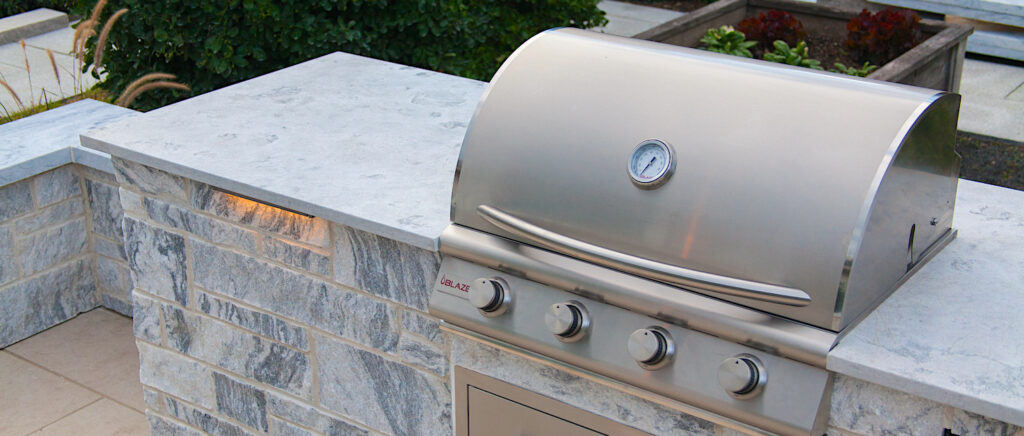
Outdoor living spaces have evolved from simple patios to sophisticated entertainment areas that rival indoor kitchens in functionality and style. Today’s outdoor kitchens feature sinks, refrigerators, countertops, bars, built-in grills, and freestanding pizza ovens that demand finishes worthy of these substantial investments. Natural stone veneer provides the perfect solution, creating outdoor spaces that complement your home’s foundation, beautiful stone pavers, and architectural elements.
Modern stone quarrying and manufacturing technologies have revolutionized natural stone thin veneers, making them lighter, easier to install, and more versatile than traditional full-bed alternatives. Polycor’s Estate Veneer Series offers an impressive variety of colors, sizes, and finishes that transform ordinary outdoor kitchens into extraordinary entertainment destinations.
Understanding Berkshire Thin Veneer
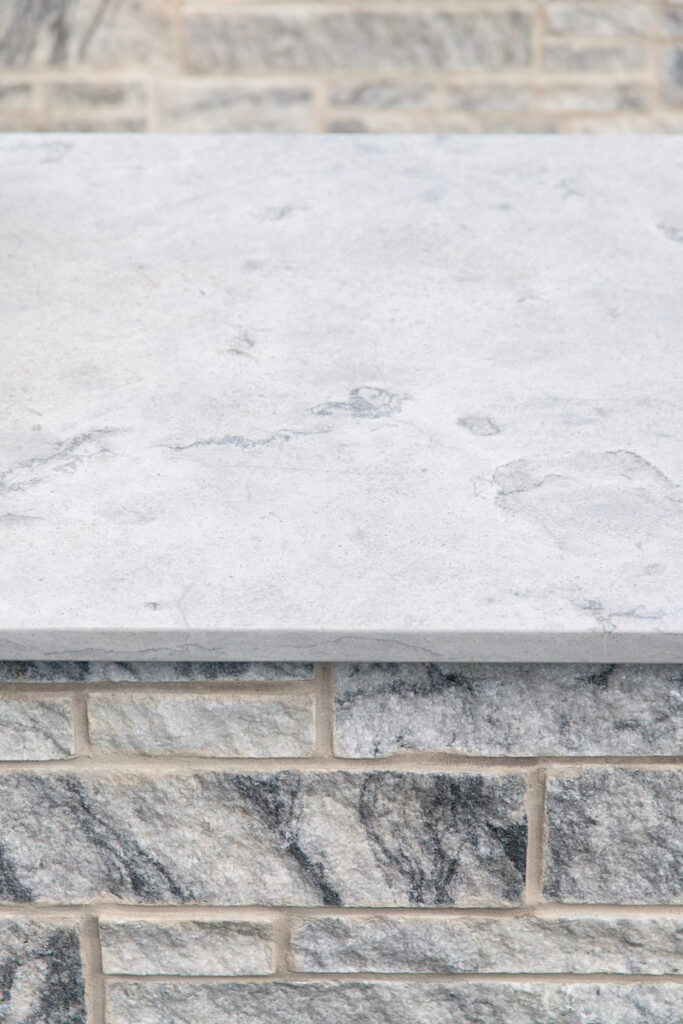
Berkshire represents a solid, split-faced natural stone veneer that creates the sophisticated appearance of traditional ashlar pattern coursing. The split-face texture provides authentic natural stone character while the thin profile makes installation faster and more economical than full-thickness alternatives.
Available in multiple height options ranging from 2¼” to 10½” for granite and limestone, Berkshire veneer accommodates various design preferences through its random lengths between 8″ and 20″. For our demonstration project, we’re using Georgia Marble – Pearl Grey from Polycor’s Georgia quarry, which comes in three height sizes for both flats and corners: 2¼”, 5″, and 7¾”. The thickness varies from ¾” to 1¼”, providing the substantial appearance of full-thickness stone while maintaining the installation advantages of thin veneer.
Substrate Preparation: Mixed Material Applications
Modern outdoor kitchens typically incorporate multiple substrate materials depending on structural requirements and design objectives. Our demonstration project features both CMU (Concrete Masonry Unit) block for low seating walls and Durock cement board over steel studs for the BBQ island construction. Understanding proper preparation techniques for each substrate ensures long-term adhesion and weather resistance.
Cement Board Preparation
Begin cement board preparation by taping all seams and corners using 2-inch wide self-adhesive cement board tape. Embed this tape with thin-set mortar to create seamless transitions that prevent moisture infiltration. Once the mortar has dried completely, apply a roll-on waterproofing membrane—in this case, MVIS Air & Water Barrier by Laticrete.
Use a ½-inch nap roller to apply the waterproofing membrane in two coats, allowing the first coat to dry completely before applying the second. This dual-coat application ensures complete coverage and optimal weather protection for your outdoor installation. The membrane must be completely dry to the touch before beginning veneer installation.
CMU Block Considerations
CMU block construction typically doesn’t require an applied water barrier due to the inherent drainage characteristics of the material. However, ensure the block surface is clean, free of efflorescence, and properly cured before beginning veneer installation. Any loose mortar or debris must be removed to ensure optimal adhesion.
Revolutionary Adhesive Technology
Traditional veneer installation often involves extended holding times while mortar cures, creating productivity bottlenecks and installation challenges. Modern adhesive technology eliminates these concerns through products like Vertical Instant Lock by SRW Products, a specially formulated mortar alternative that transforms the installation process.
“The new generation of adhesives has completely changed how we approach veneer installation,” explains a professional mason with decades of experience. “Products like Vertical Instant Lock save significant time by instantly locking stone in place without sag or slip, while still allowing repositioning for up to 10 minutes if adjustments are needed.”
This quick-curing adhesive is rated for exterior use and performs consistently in the demanding conditions typical of outdoor kitchen environments. The repositioning capability provides flexibility for achieving perfect alignment while the instant grab eliminates the need for temporary supports during curing.
Surface Preparation Requirements
Proper surface preparation ensures optimal adhesive performance and long-term installation success. Clear all surfaces of materials that could prevent adequate adhesion, including heavy textures, dirt, dust, or other loose particles. Surfaces must be completely flat, thoroughly dry, and maintained above 40°F during installation and initial curing.
These preparation requirements apply equally to both CMU block and cement board substrates, ensuring consistent performance regardless of the underlying construction material.
Installation Technique: Professional Methods
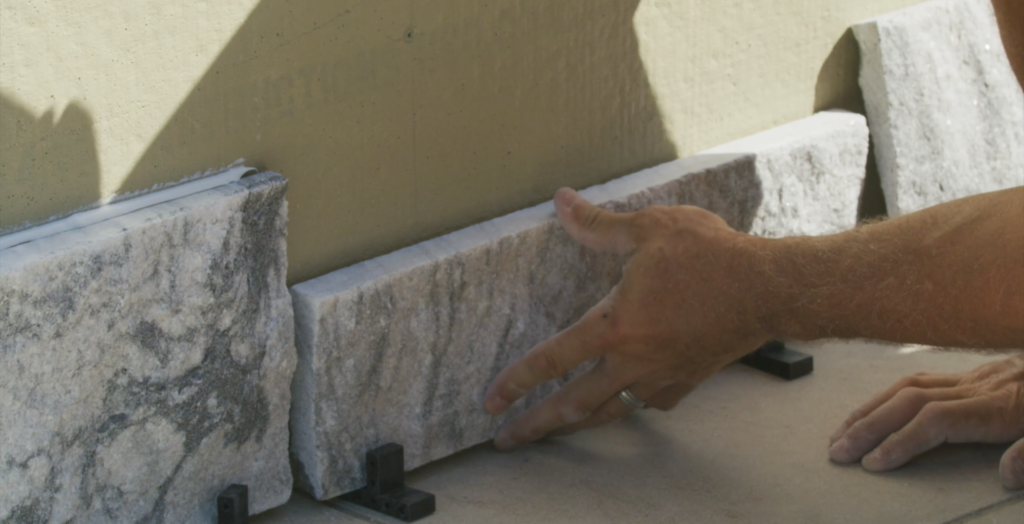
Professional stone veneer installation begins with establishing proper reference points and maintaining consistent coursing throughout the project. Start at the bottom of the wall using ⅜” spacers placed on the paving to establish the first course height. For walls without adjacent paving, install a temporary ledger board to support the first course during installation.
Corner Installation
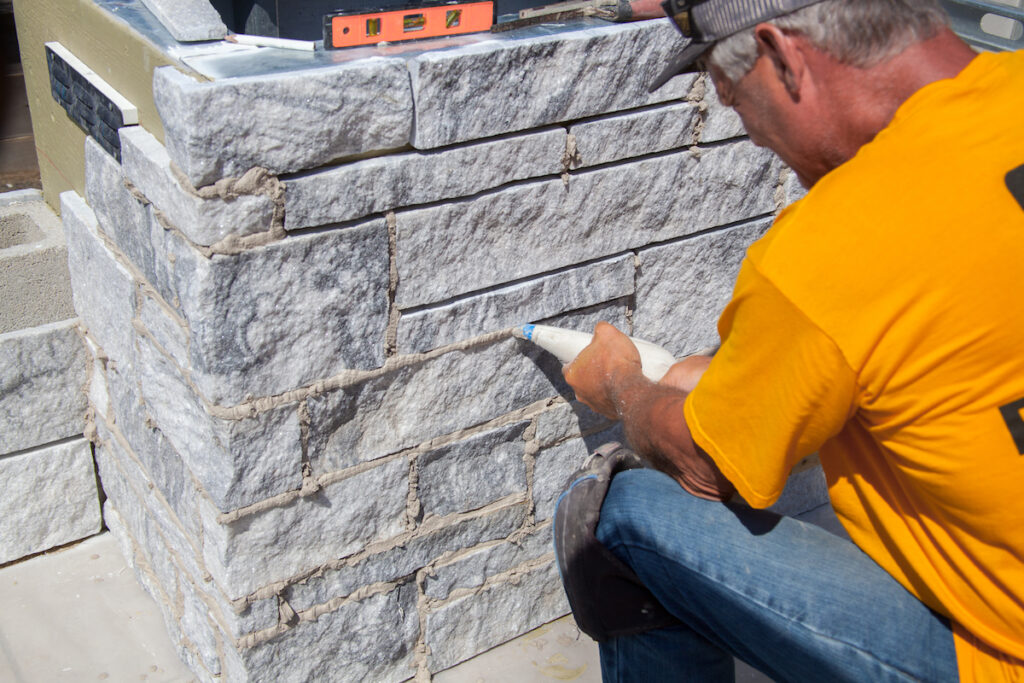
Begin each course with corner pieces, selecting sizes that best suit your overall design intent. Using an appropriately sized caulking gun with a minimum 14:1 thrust ratio, hold the nozzle at a 90-degree angle with the V-notch positioned upward. Apply continuous vertical beads of adhesive spanning the full width of the veneer while staying ½” from outside edges.
The vertical bead pattern serves dual purposes: providing adequate adhesive coverage while promoting water drainage down the interior wall surface. Never apply adhesive in spot patterns, as this creates potential water collection points that could compromise long-term performance.
Press corner pieces firmly into position, checking immediately for level and plumb alignment. The instant grab of modern adhesives means adjustments must be made quickly, but the 10-minute repositioning window allows time for fine-tuning placement.
Flat Veneer Installation
Choose flat pieces in various sizes to create attractive random patterns that avoid monotonous repetition. It helps to lay out a series of veneer pieces on the ground to experiment with arrangements, adjusting as needed to create the most aesthetically pleasing design.
Pattern selection isn’t an exact science—let your eye and creativity guide the process while following some basic principles. Avoid continuous vertical joints taller than your longest veneer piece (in this case, 22″). Such joints create visual interruptions that detract from the natural stone appearance.
Understanding the proportional mix of piece sizes helps maintain design balance throughout the installation. Typical crate proportions include 15% at 2¼”, 40% at 5″, and 45% at 7¾”. Periodically assess your remaining inventory to ensure you maintain these proportions throughout the project rather than using all large pieces early and being left with only small pieces for completion.
Inside Corner Details
Inside corners require special attention to maintain structural integrity and visual continuity. Alternate the lapping arrangement with each course—one course has veneer extending completely to the inside corner, while the adjacent course features the joining wall’s veneer extending to the corner. Butt remaining pieces against the face of the adjacent veneer for clean, professional-appearing joints.
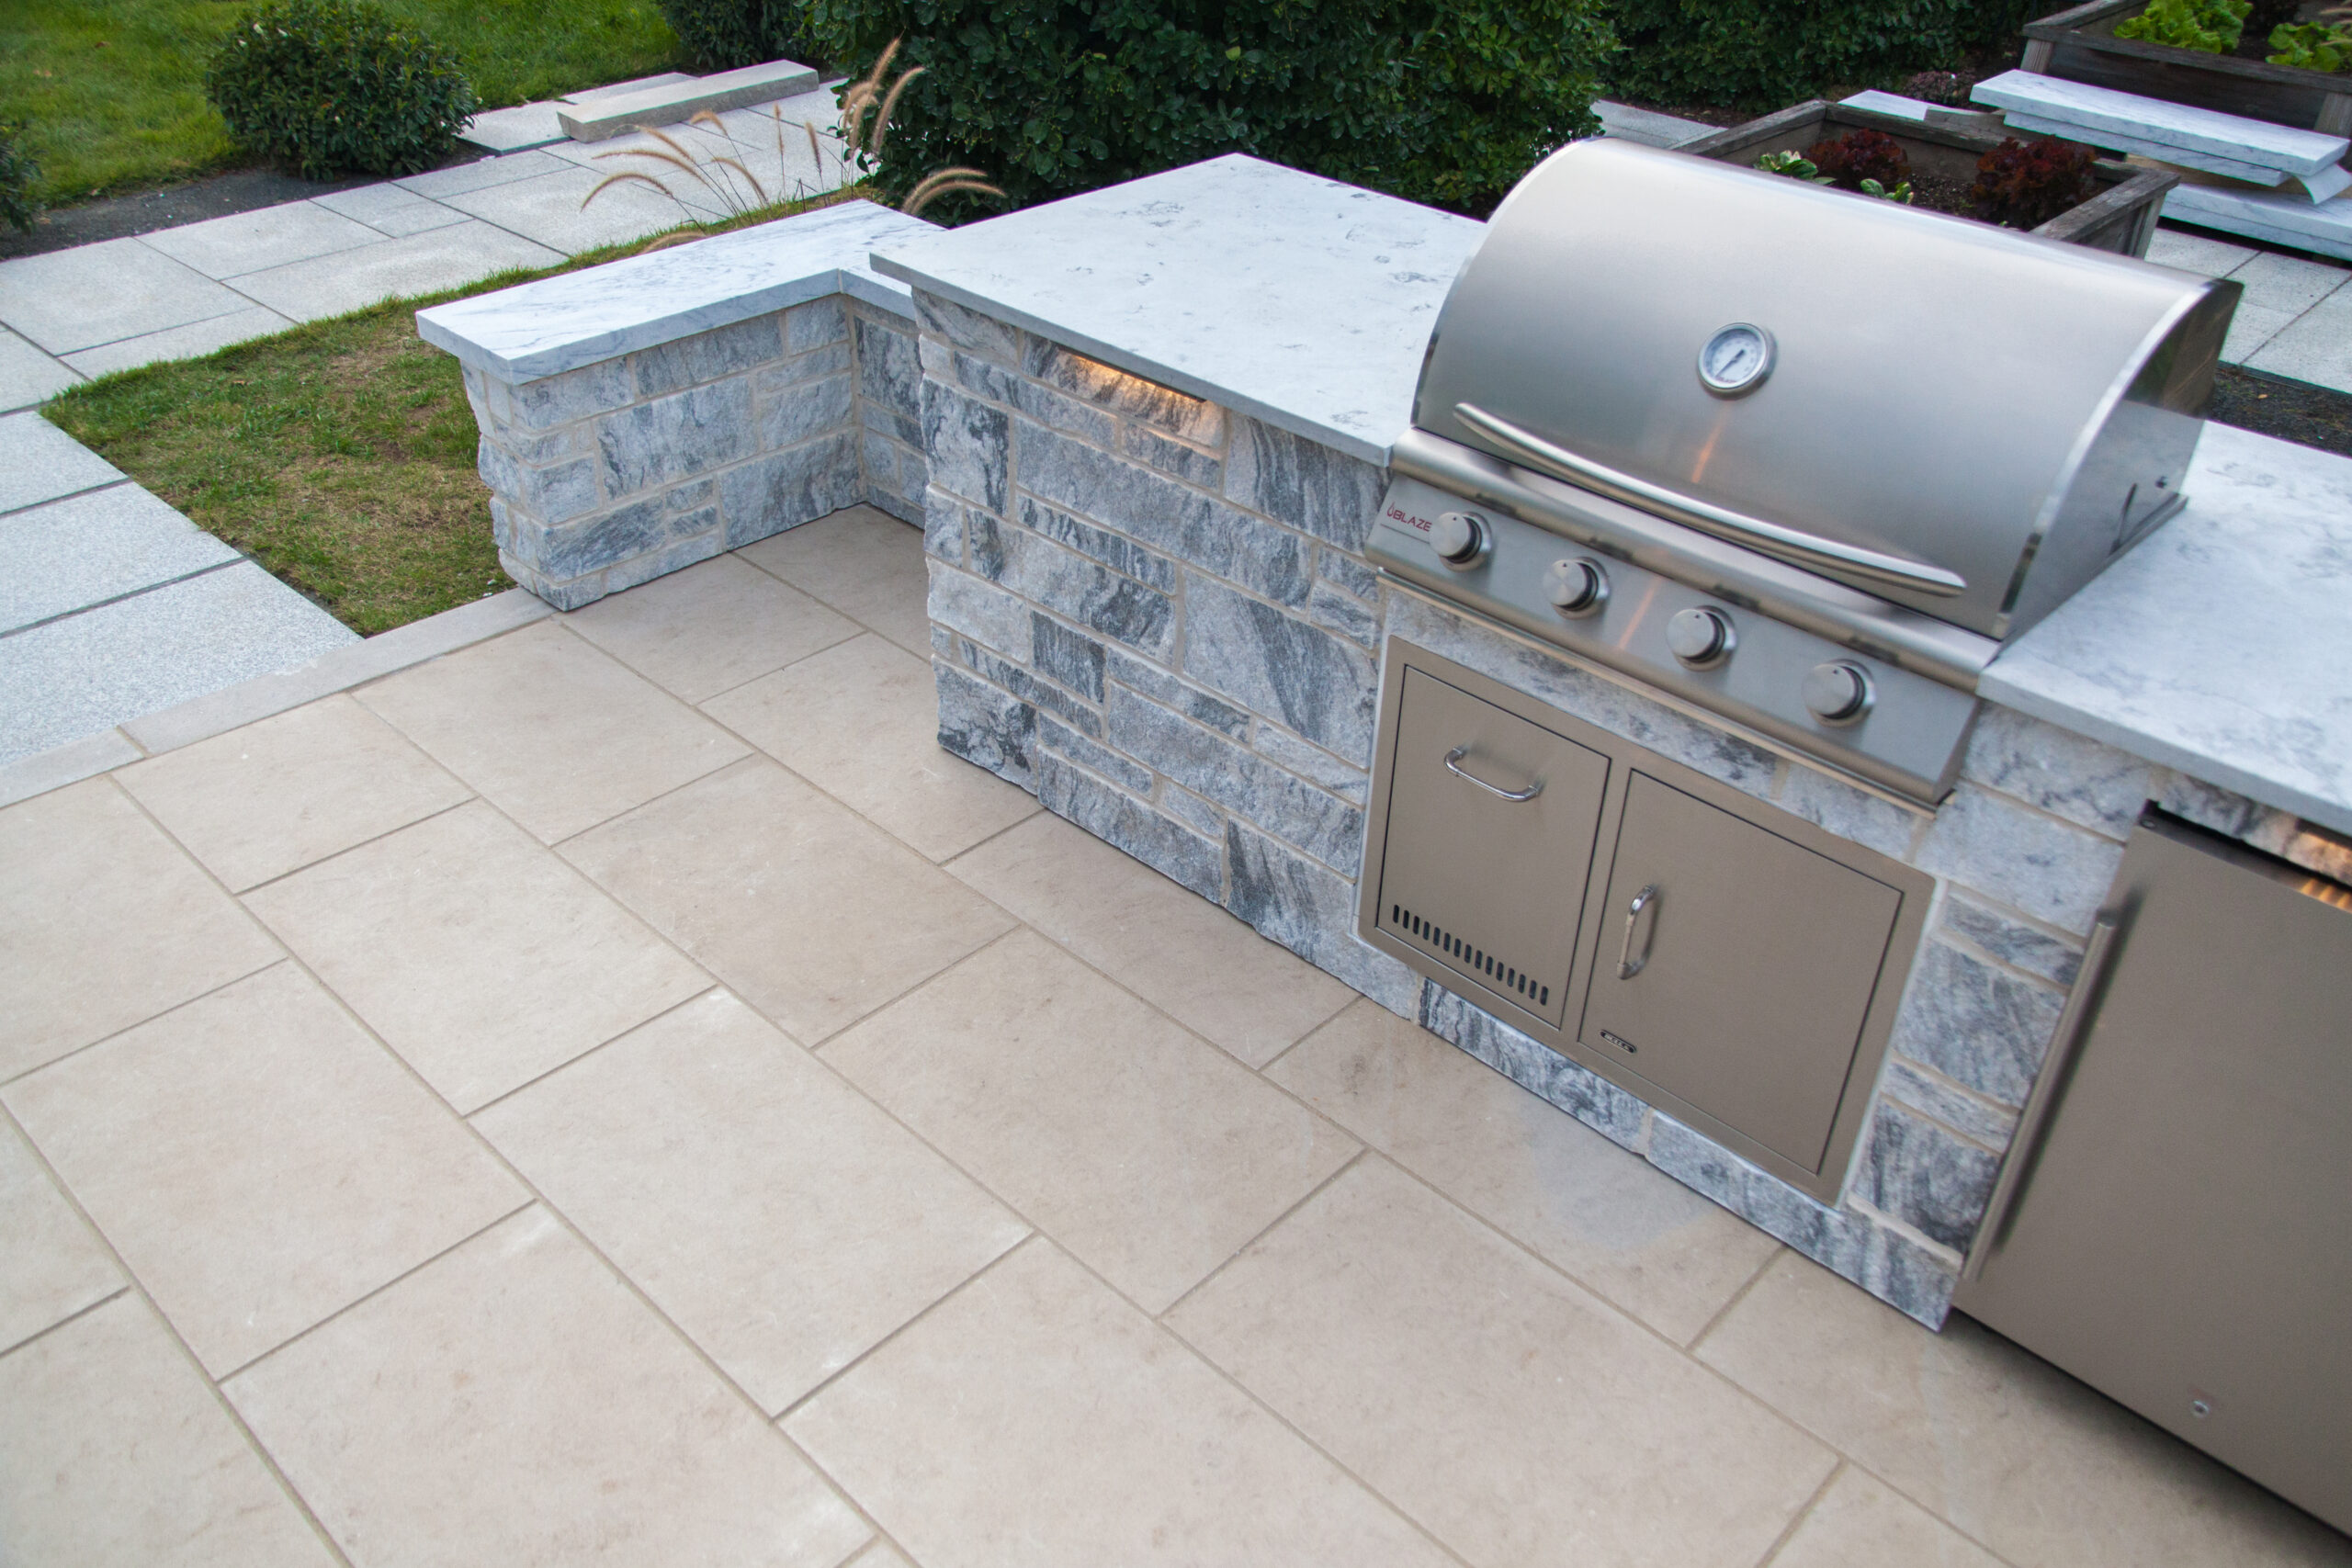
Cutout Management
Outdoor kitchens require numerous cutouts for BBQ doors, refrigerators, vents, and electrical receptacles. Minimize the number of notches cut into veneer pieces by adjusting layouts to accommodate standard veneer sizes whenever possible. Consider the thickness of your veneer when planning cutouts—thin strips of Azek or PVC can shim out vents and fixtures to prevent them from appearing deeply recessed.
Substrate Transition Considerations
When veneer spans multiple substrate types, account for potential differential movement over time. In our demonstration project, cement board backing the BBQ sits between CMU walls on either side. To prevent veneer failure from substrate movement, avoid overlapping veneer pieces across substrate transitions. Instead, create control joints at substrate seams and terminate veneer at these locations.
Joint Finishing: The Professional Touch
Proper joint finishing transforms good veneer installation into exceptional craftsmanship. Begin by removing all spacers and scraping excess adhesive from joint spaces. Lay protective plastic sheeting over paving and work areas to facilitate cleanup during mortaring operations.
Mortar Selection and Mixing
For exterior veneer applications, use Type N mortar specifically designed for jointing applications. Type N’s lower compressive strength prevents excessive pressure within joints that could damage stone. SpecMix Artic White provides excellent color coordination with Georgia Marble – Pearl Grey while offering the performance characteristics needed for exterior applications.
Mix mortar with water using a paddle mixer attached to a drill, achieving a flowing consistency similar to smooth cake batter. Proper consistency ensures the mortar flows easily into joints while maintaining adequate strength for long-term performance.
Joint Application Technique
Spray the interior of a grout bag with water to prevent mortar adhesion, then fill the bag with properly mixed mortar. Adjust tip size to accommodate ⅜” joints effectively. Twist the bag’s opposite end and begin squeezing mortar into joints, working from bottom to top in systematic fashion.
Leave joints slightly heavy with some excess mortar, but avoid excessive amounts that run down stone faces. Clean mortar from stone surfaces immediately using damp rags and clean water, as dried mortar becomes much more difficult to remove.
Joint Tooling
Once mortar reaches thumb-print hardness (approximately 15 minutes), begin tooling joints with a ⅜” masonry tuckpointing trowel. Press and rake mortar into joints while shaping them for consistent appearance. Tool vertical head joints first, then follow with long, continuous strokes along horizontal joints.
Continue cleaning stone surfaces as needed throughout the tooling process to remove excess mortar or application drips. After mortar has fully cured, use a stiff nylon brush to sweep all joints, eliminating excess material and further dressing joint profiles.
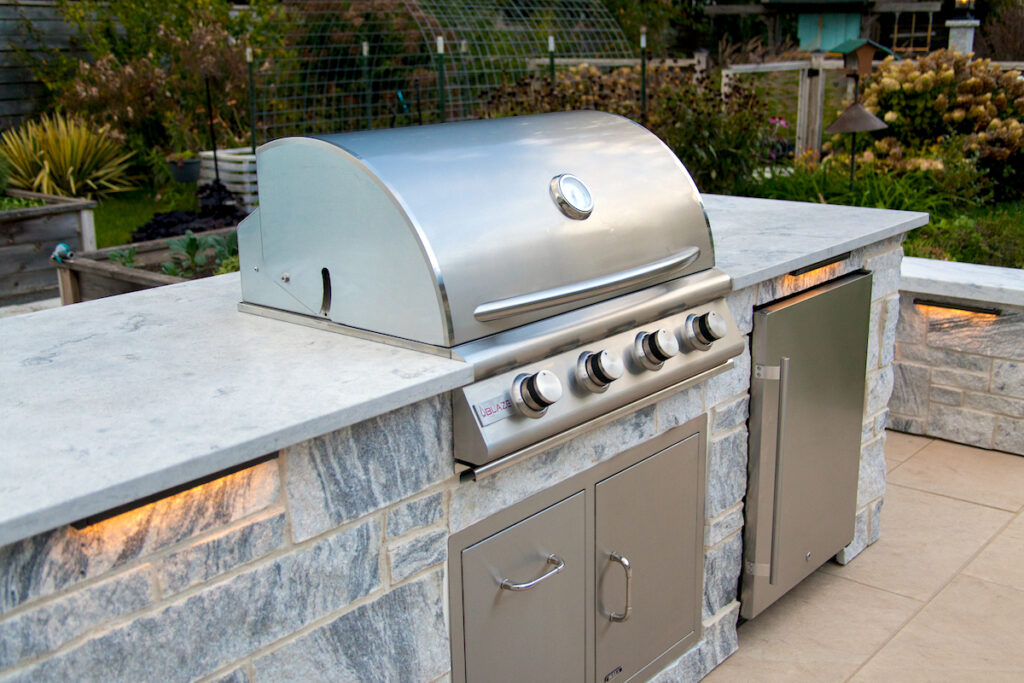
Completing the Design
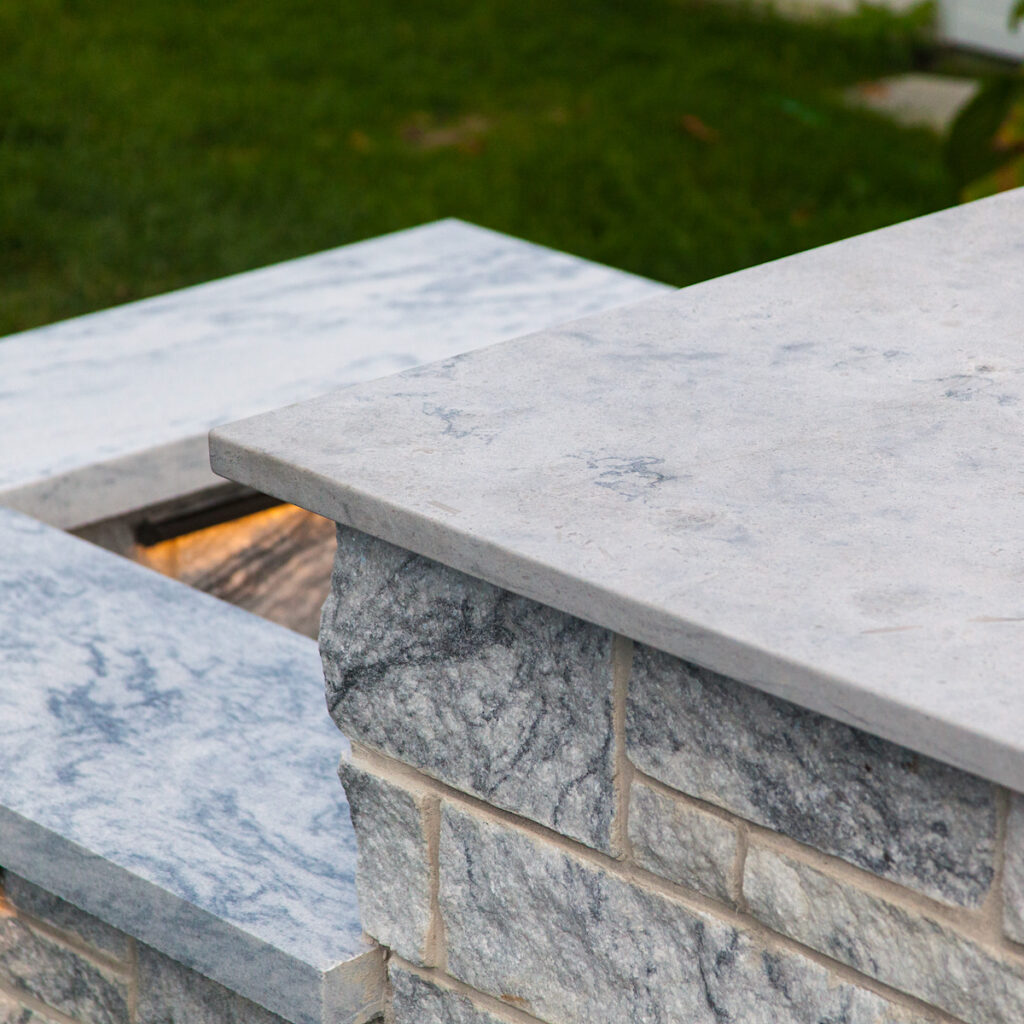
Professional outdoor kitchen installations extend beyond veneer work to include coordinating elements that create cohesive designs. Wall caps, countertops, and lighting complete the transformation from functional cooking space to entertainment destination.
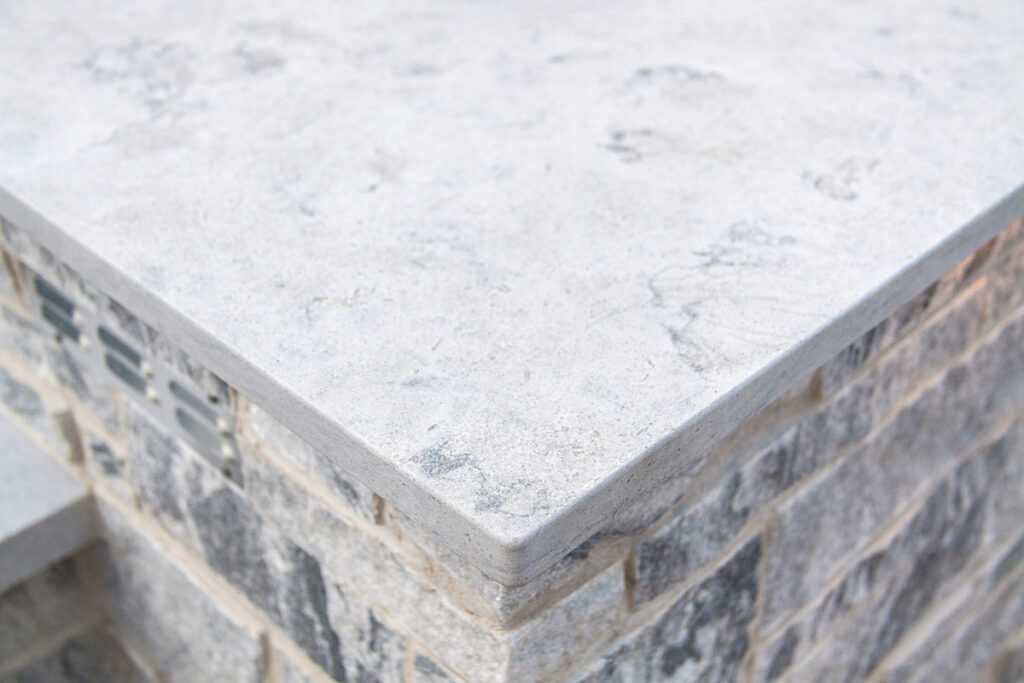
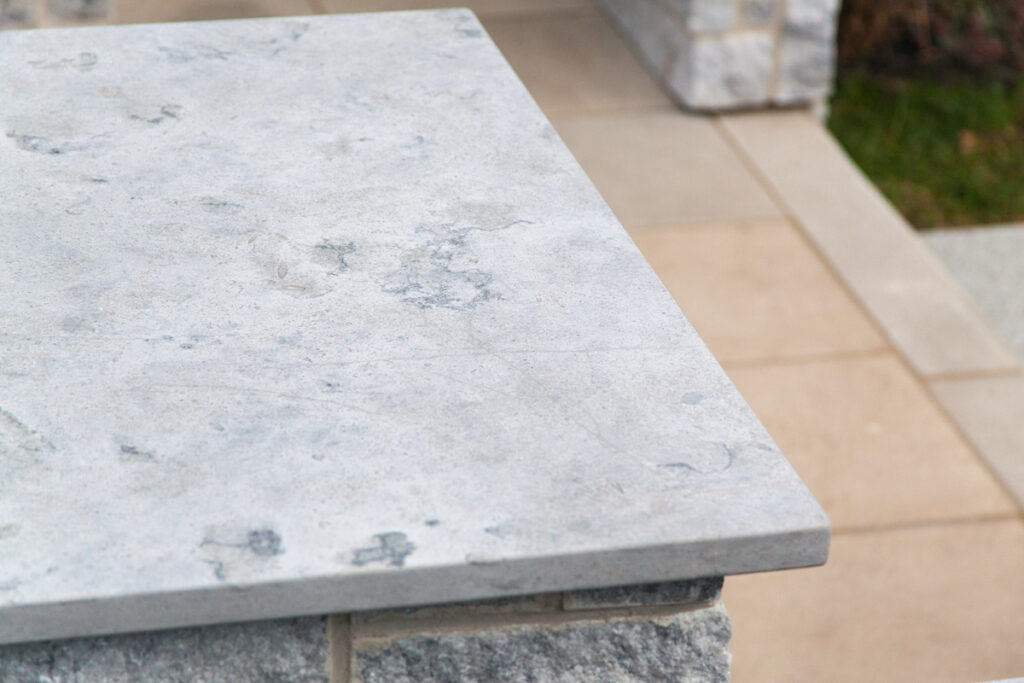
Using matching Georgia Marble – Pearl Grey for wall caps maintains color and veining consistency while the honed finish creates beautiful textural contrast with the split-face veneer. Since both materials come from the same quarry blocks, the color coordination is perfect while the finish variation adds sophisticated design interest.
The Evolution of Outdoor Living
Natural stone veneers have evolved far beyond their traditional role as siding alternatives. Today’s contractors discover new applications regularly, taking advantage of improved installation products and techniques that reduce labor requirements while enhancing performance.
“The combination of modern adhesives and traditional craftsmanship opens up possibilities we couldn’t imagine just a few years ago,” notes an experienced outdoor kitchen installer. “Projects that once took weeks can now be completed in days, while achieving better long-term performance and customer satisfaction.”
While traditional installation methods remain viable options, next-generation adhesives and mortars save contractors significant labor, time, and expense while often delivering superior results. This evolution benefits both contractors and property owners through faster project completion and enhanced durability.
Professional Installation Tips
Learning how to install stone veneer properly requires understanding both the materials and the methodology. When working with marble veneer like Georgia Marble – Pearl Grey, pay special attention to the natural veining patterns and color variations that make each piece unique. The key to successful stone veneer install projects lies in proper substrate preparation, quality adhesive application, and meticulous attention to joint finishing details that separate professional installations from amateur attempts.
Investment in Outdoor Excellence
Transforming your outdoor kitchen with natural stone veneer represents more than just aesthetic improvement—it’s an investment in entertaining capability and property value. The sophistication of properly installed stone veneer elevates outdoor spaces to rival indoor kitchens while providing the durability needed for exterior applications.
Ready to transform your outdoor kitchen into an entertainment destination worthy of your culinary ambitions? Contact a Polycor expert today to explore how Berkshire thin veneer and other Estate Veneer Series products can create the outdoor living space you’ve envisioned. Professional guidance ensures you achieve both the immediate visual impact and long-term performance that make natural stone veneer such a compelling choice for discriminating property owners.


