Polycor U
How to Install Rockford Veneer on a Home Exterior Using Rainscreen
Natural, durable, and aesthetically pleasing, there’s little wonder why thin stone veneers have become a popular choice of masonry material with homeowners. The benefits are widely recognized and contractors are finding there’s a huge payoff in customer satisfaction (and property values).
Course Description
What you put behind the stone matters just as much as the stone itself. Rainwater infiltration or plain atmospheric moisture can get trapped behind, and within the veneer wall’s nooks and crannies. This osmosis can lead to hydrostatic pressure or movement in the substrate that can push stone off the walls or “pop”. A drainage layer is key to getting moisture out and keeping it out. In this video, we show how rainscreen products help mitigate the risk associated with adhered veneers. Just remember to keep ‘drain on the brain’!
Installation Process: Professional Foundation Wall Application
When installing stone veneer for foundation applications, proper preparation and technique are essential for long-lasting results.
Establishing Reference Lines
Begin by establishing a level line and snapping chalk lines corresponding to the grade and finish heights of the veneer and limestone sills at the top. Accurate layout is crucial for achieving professional results, so take time to ensure all measurements are precise.
Attach a ledger board to the wall, ensuring it’s perfectly level for the starter course of veneer. This temporary support prevents the bottom course from sliding while the mortar cures and establishes the reference line for all subsequent courses. Double-check all measurements before beginning mortar application.
Mortar Preparation and Application
When working with stone veneer foundation installations, proper mortar selection is crucial. Mix MVIS Veneer Mortar with water to the desired consistency using a paddle mixer and drill, following manufacturer recommendations (approximately 3.4 parts powder to 1 part water). Many contractors prefer spec mix stone veneer mortarfor its consistent performance and workability. Mix for one minute or until achieving a creamy, smooth, mashed potato consistency. Allow the mixture to slake for 5 minutes, remix, and begin use. Add slightly more water if necessary for proper consistency.
Key a skim coat of mortar to the wall approximately ½” to ¾” thick using the flat side of a ½” x ½” notched trowel. Once applied, turn the trowel to the notched side, hold at a 45-degree angle, and run grooves into the mortar. Spread only enough mortar that can be covered with veneer within 15-20 minutes to prevent skinning over.
Corner Installation First
Start by selecting your corner veneer pieces, which you’ll install at outside corners first. These pieces establish the critical dimensions and alignment for the entire installation, so choose pieces that work well together and create attractive proportions.
Before installation, clean the back of each stone to remove any dust or excess film that could impede bonding. Next, back butter the entire rear of the stone veneer with a thin skim coat of mortar using a margin trowel. Complete coverage ensures optimal adhesion and long-term performance.
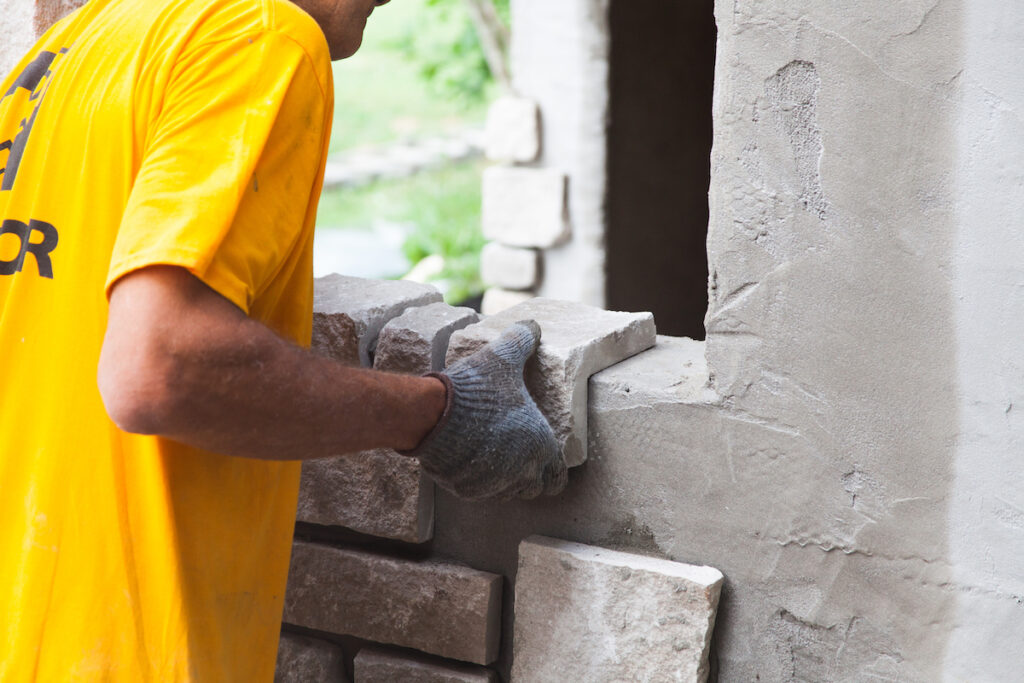
Setting Technique for Maximum Adhesion
With ⅜” spacers in hand, install the veneer into the desired location by applying firm pressure, locking it into the mortar bed, and slide it roughly 1″ to 1½” away from the desired final position and back into the desired position while maintaining even pressure. This sliding technique ensures the mortar is fully embedded in the space between veneer and wall, with excess mortar squeezing out around edges indicating proper adherence with 100% coverage to both substrate and stone.
For thinset stone veneer applications, this technique is particularly important as it ensures proper bond strength. Clean the excess, extruded mortar with the trowel out of the joints to allow space for pointing mortar. Check the MVIS mortar for complete coverage by periodically removing a piece of veneer and inspecting the transfer onto the back of the stone. This quality control step prevents adhesion problems that could lead to veneer failure.
Pattern Development and Layout
Work your way up along the wall and inward from the corner pieces using ⅜” spacers to maintain equal joint widths. It helps to lay out a series of veneer flats on the ground and experiment with arrangements, adjusting as needed to create the most aesthetically pleasing design.
Pattern selection isn’t an exact science—let your eye and creativity guide you. However, a good rule of thumb is to avoid continuous vertical joints taller than the longest piece of veneer (in this case, 20″). Such joints create visual weakness and detract from the natural stone appearance you’re trying to achieve.
Stone Sill Installation: Professional Finishing Touch
On this project, the home was framed and sheathed, so we measured down from the sheathing and stopped the veneer to accommodate a 2¼” thickness stone sill made from Indiana Limestone – Full Color Blend, also from Polycor’s Hardscapes & Masonry line of products.
These stone sills are specially designed to complement the thickness of thin veneer and create a rich design element to cap off the wall. They come in 3″ depths and 48″ lengths for adequately sized reveals over the veneer. Copper flashing will be installed at the joint between the top of the sill and sheathing to start the clapboard siding above.
Sill Installation Process
Dry-fit the stone sill into the allotted space and check for accuracy. Pitch the sill approximately 15 degrees for proper slope and water drainage while leveling with shims underneath. It helps to measure from grade to the underside of the sill and cut 2x4s to prop up underneath and brace it while the mortar cures.
Apply the veneer mortar to the top course of veneer in 48″ lengths as well as to the back side of the sill and press firmly into place, maintaining the correct pitch. Brace with 2x4s and allow to cure overnight before removing temporary supports.
Joint Finishing: The Final Professional Touch
The final step involves installing pointing mortar in the desired pre-mixed color to complement the design. For this project, we used Type N Portland lime and sand mortar by SpecMix in Light Buff. This preblended mix contains Portland cement, hydrated lime, and dried masonry sand.
Type N is best suited for jointing because it has lower PSI strength and won’t add excessive pressure into joints that could damage the stone. This softer mortar also allows for slight movement without cracking, extending the installation’s service life.
Joint Mortar Application
Pull all spacers from the joints in preparation for the mortar job. Lay plastic sheets down onto paving and work areas to catch excess mortar. Using a 5-gallon bucket, mix the mortar with water and a paddle mixer attached to a drill to obtain flowing consistency like smooth cake batter.
Spray the inside of a grout bag with water and fill the bag. Adjust tip size as needed to best accommodate the ⅜” joint, twist the opposite end, and begin squeezing mortar into all joints working from bottom upward. Leave joints slightly heavy with some excess mortar squeezed out but not so much that it runs down the stone face.
Clean mortar from the stone face as you work with damp rags and a bucket of clean water. This prevents staining and ensures a clean, professional appearance.
Joint Tooling and Finishing
Once the mortar is thumb-print hard and slightly firm (approximately 15 minutes), begin tooling the joints with a ⅜” masonry tuckpointing trowel. Press and rake the mortar into the joints, shaping them as you work. Tool the vertical head joints first, then follow with long, continuous strokes along the length of the horizontal joints.
Continue to wipe and clean the stone as needed to remove any excess mortar or drips from the application process. After the mortar has been tooled and fully cured, use a nylon brush and sweep all joints to eliminate any excess and further dress the joint profiles.
Transforming Your Home’s Foundation
This simple, straightforward application instantly upgrades home building projects from cookie-cutter to custom. The combination of authentic natural stone with modern installation techniques creates foundations that enhance your home’s architectural character while providing the durability expected from quality materials.
Though easy to install, natural stone veneers give the impression of something more monolithic, heavy, and substantial—like an installation achieved through traditional masonry methods. This visual impact significantly enhances curb appeal while requiring only a fraction of the labor and structural support needed for full-thickness stone construction.
Ready to transform your home’s foundation with the timeless beauty of natural stone veneer? Contact a Polycor expert today to explore how Rockford Estate Blend and other thin veneer options can enhance your home’s architectural presence while delivering the authentic character that only genuine natural stone can provide.


