Indiana Limestone Thin Veneer: Styles, Specs & Installation Guide
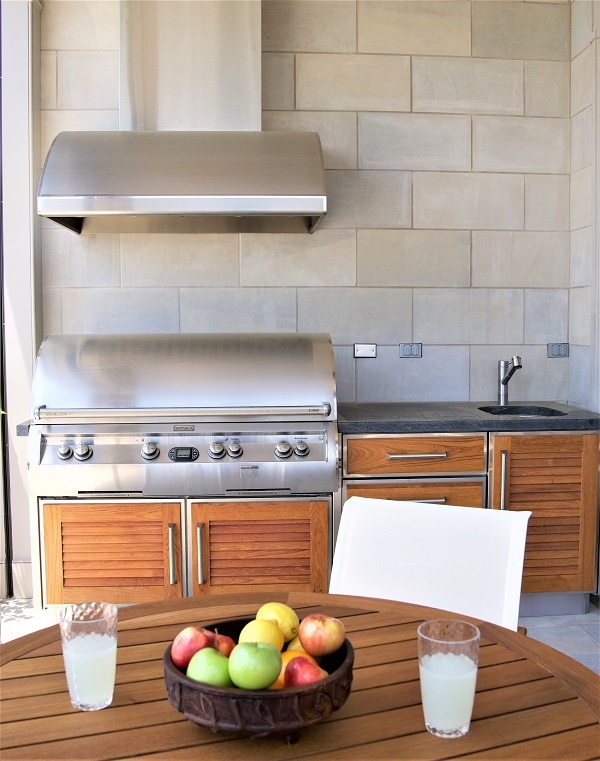
If you’ve mastered the patio project, it’s time to add thin veneer installation to your skill set. This quick to apply material is an easy upgrade to outdoor kitchens, fireplaces, and building exteriors. Learn the quick and easy process to install Indiana limestone veneer and not only will your customer list grow, but so will the value of each.
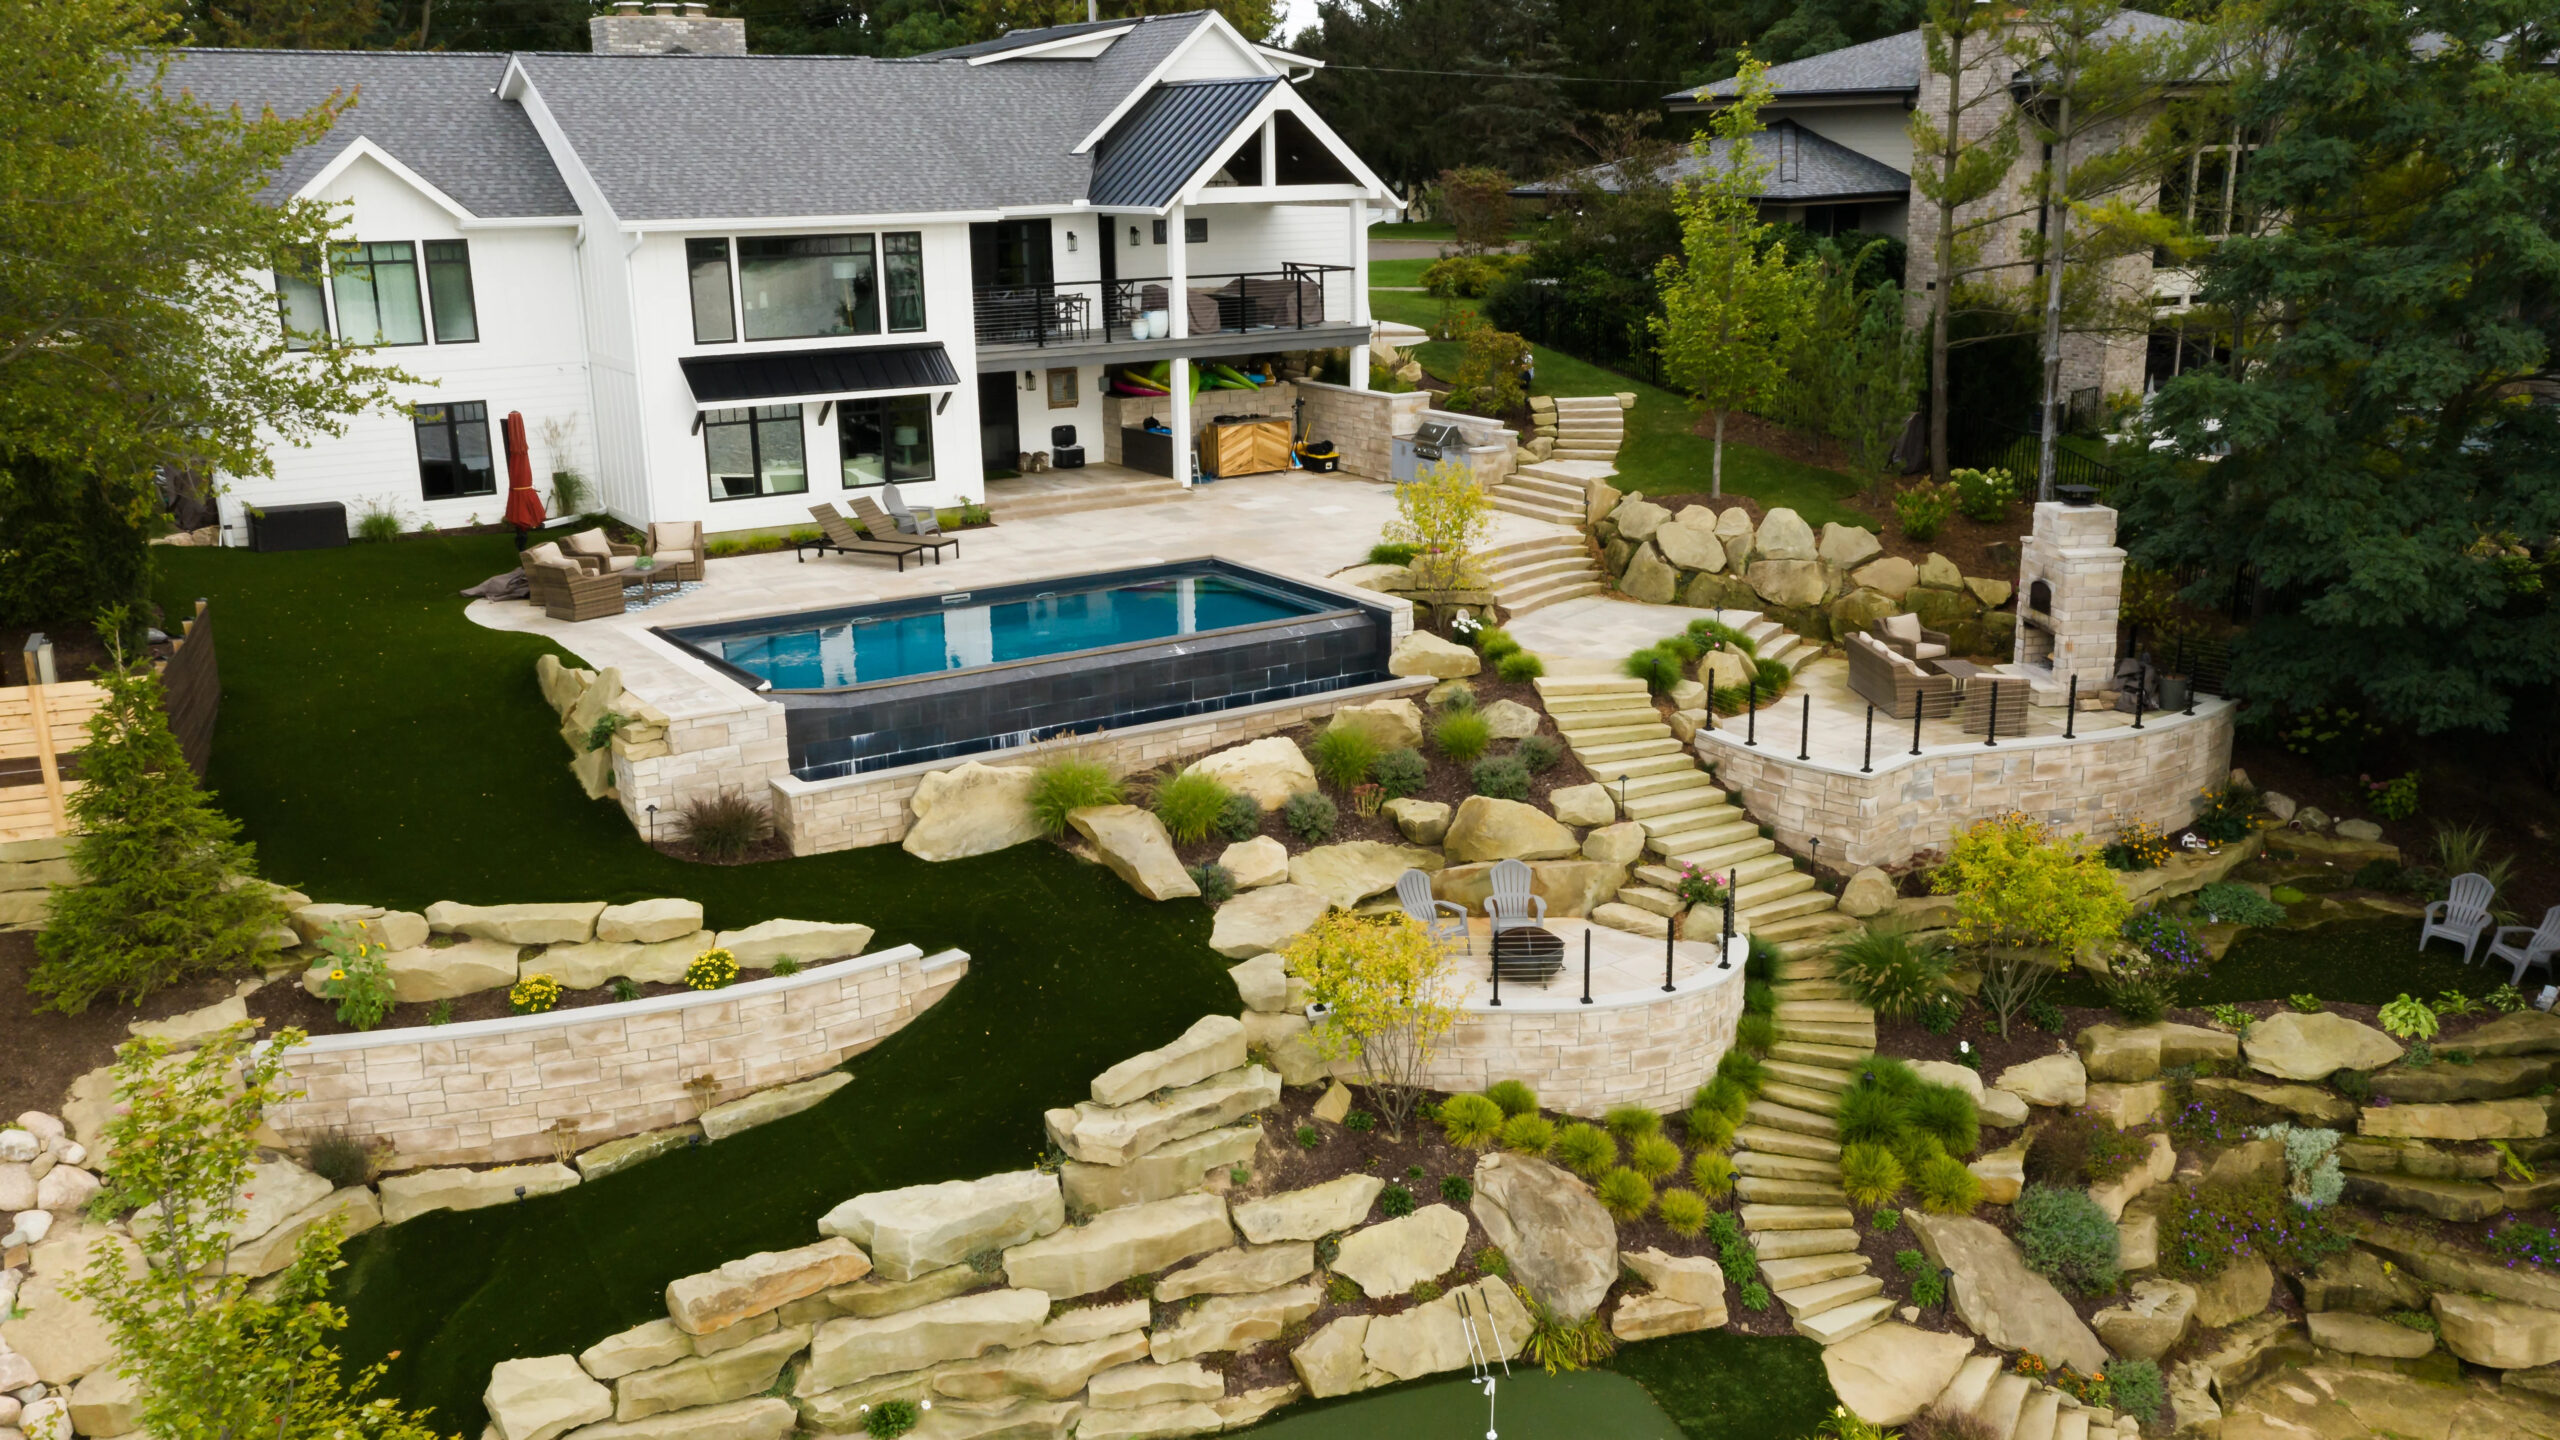
For nearly 200 years, Indiana limestone has been an enduring building stone choice and has become an American classic. Think the Empire State Building, the Pentagon, and the iconic Biltmore estate. It’s got a timeless look that residents want and is a great fit for adding a bit of history to new construction. Contractors favor it because, unlike brick or thick stone veneer which can be labor intensive and difficult to install, Indiana limestone thin veneers are lightweight and easy for a single contractor to manage.
The Estate Veneer Series: Three Profiles, One Standard of Quality
Indiana limestone is like the white button-down of natural stones: you can dress it up or down and it goes with just about anything. Depending on how you finish it, it can be rustic or it can be classic. Because it’s the same composition throughout, the stone resists fading over decades, is impervious to the freeze-thaw cycle, and requires very little maintenance.
Polycor’s Estate Veneer Series brings the timeless character of Indiana Limestone, North American granite, and Georgia marble into a modern natural stone veneer for today’s construction and design demands. Three distinct profiles give architects, designers, and contractors the flexibility to match aesthetic intent without compromising on authenticity. Each style is quarried and cut to exacting tolerances, available in full-bed and thin veneer formats, and backed by Polycor’s century-long quarrying heritage.
A quick rundown of the three styles in the Estate Veneer Series line of stone veneer:
Vanderbilt Classic™
Precision-Cut. Architecturally Refined.
The Vanderbilt Classic™ is a classic architectural stone veneer. It is the most dimensionally precise profile in the Estate Veneer Series and is the most architecturally versatile. Whereas other veneer styles embrace natural variation in edges and coursing heights, Vanderbilt delivers consistent modular dimensions with four fixed heights (3⅝″, 7⅝″, 11⅝″, and 15⅝″) paired with a uniform 23⅝″ length. The result is a clean, structured ashlar pattern that reads as intentional and refined whether applied to a contemporary residential facade, a corporate lobby wall, or a high-end hospitality interior.
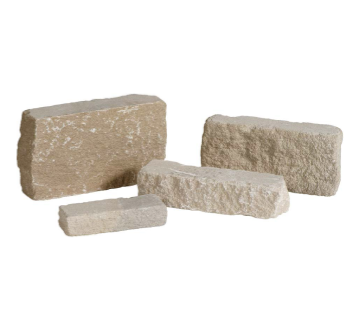
Full Bed Veneer
Thin Veneer Flats
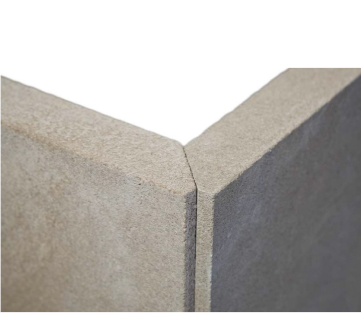
Quirk Miter Corners
Vanderbilt architectural stone veneer is the only profile in the series offered with a smooth finish on limestone and marble, and a thermal finish on granite — surface treatments that amplify the stone’s natural color and lend a sophistication suited to upscale interiors and architectural feature walls. Quirk miter corners are available in all four height courses, and all corner units are reversible for right and left installation. Thin veneer depth varies by stone type with limestone being 1 3/16″ thickness, granite at 1″ thickness, and marble at 25/32″ thickness.
For full-bed applications, Vanderbilt architectural stone veneer maintains its modular discipline of 3⅝″ depth across all four heights, making it an ideal choice for projects where dimensional consistency is a specification requirement.
Berkshire™
Classic Ashlar Character. Split-Face Texture.
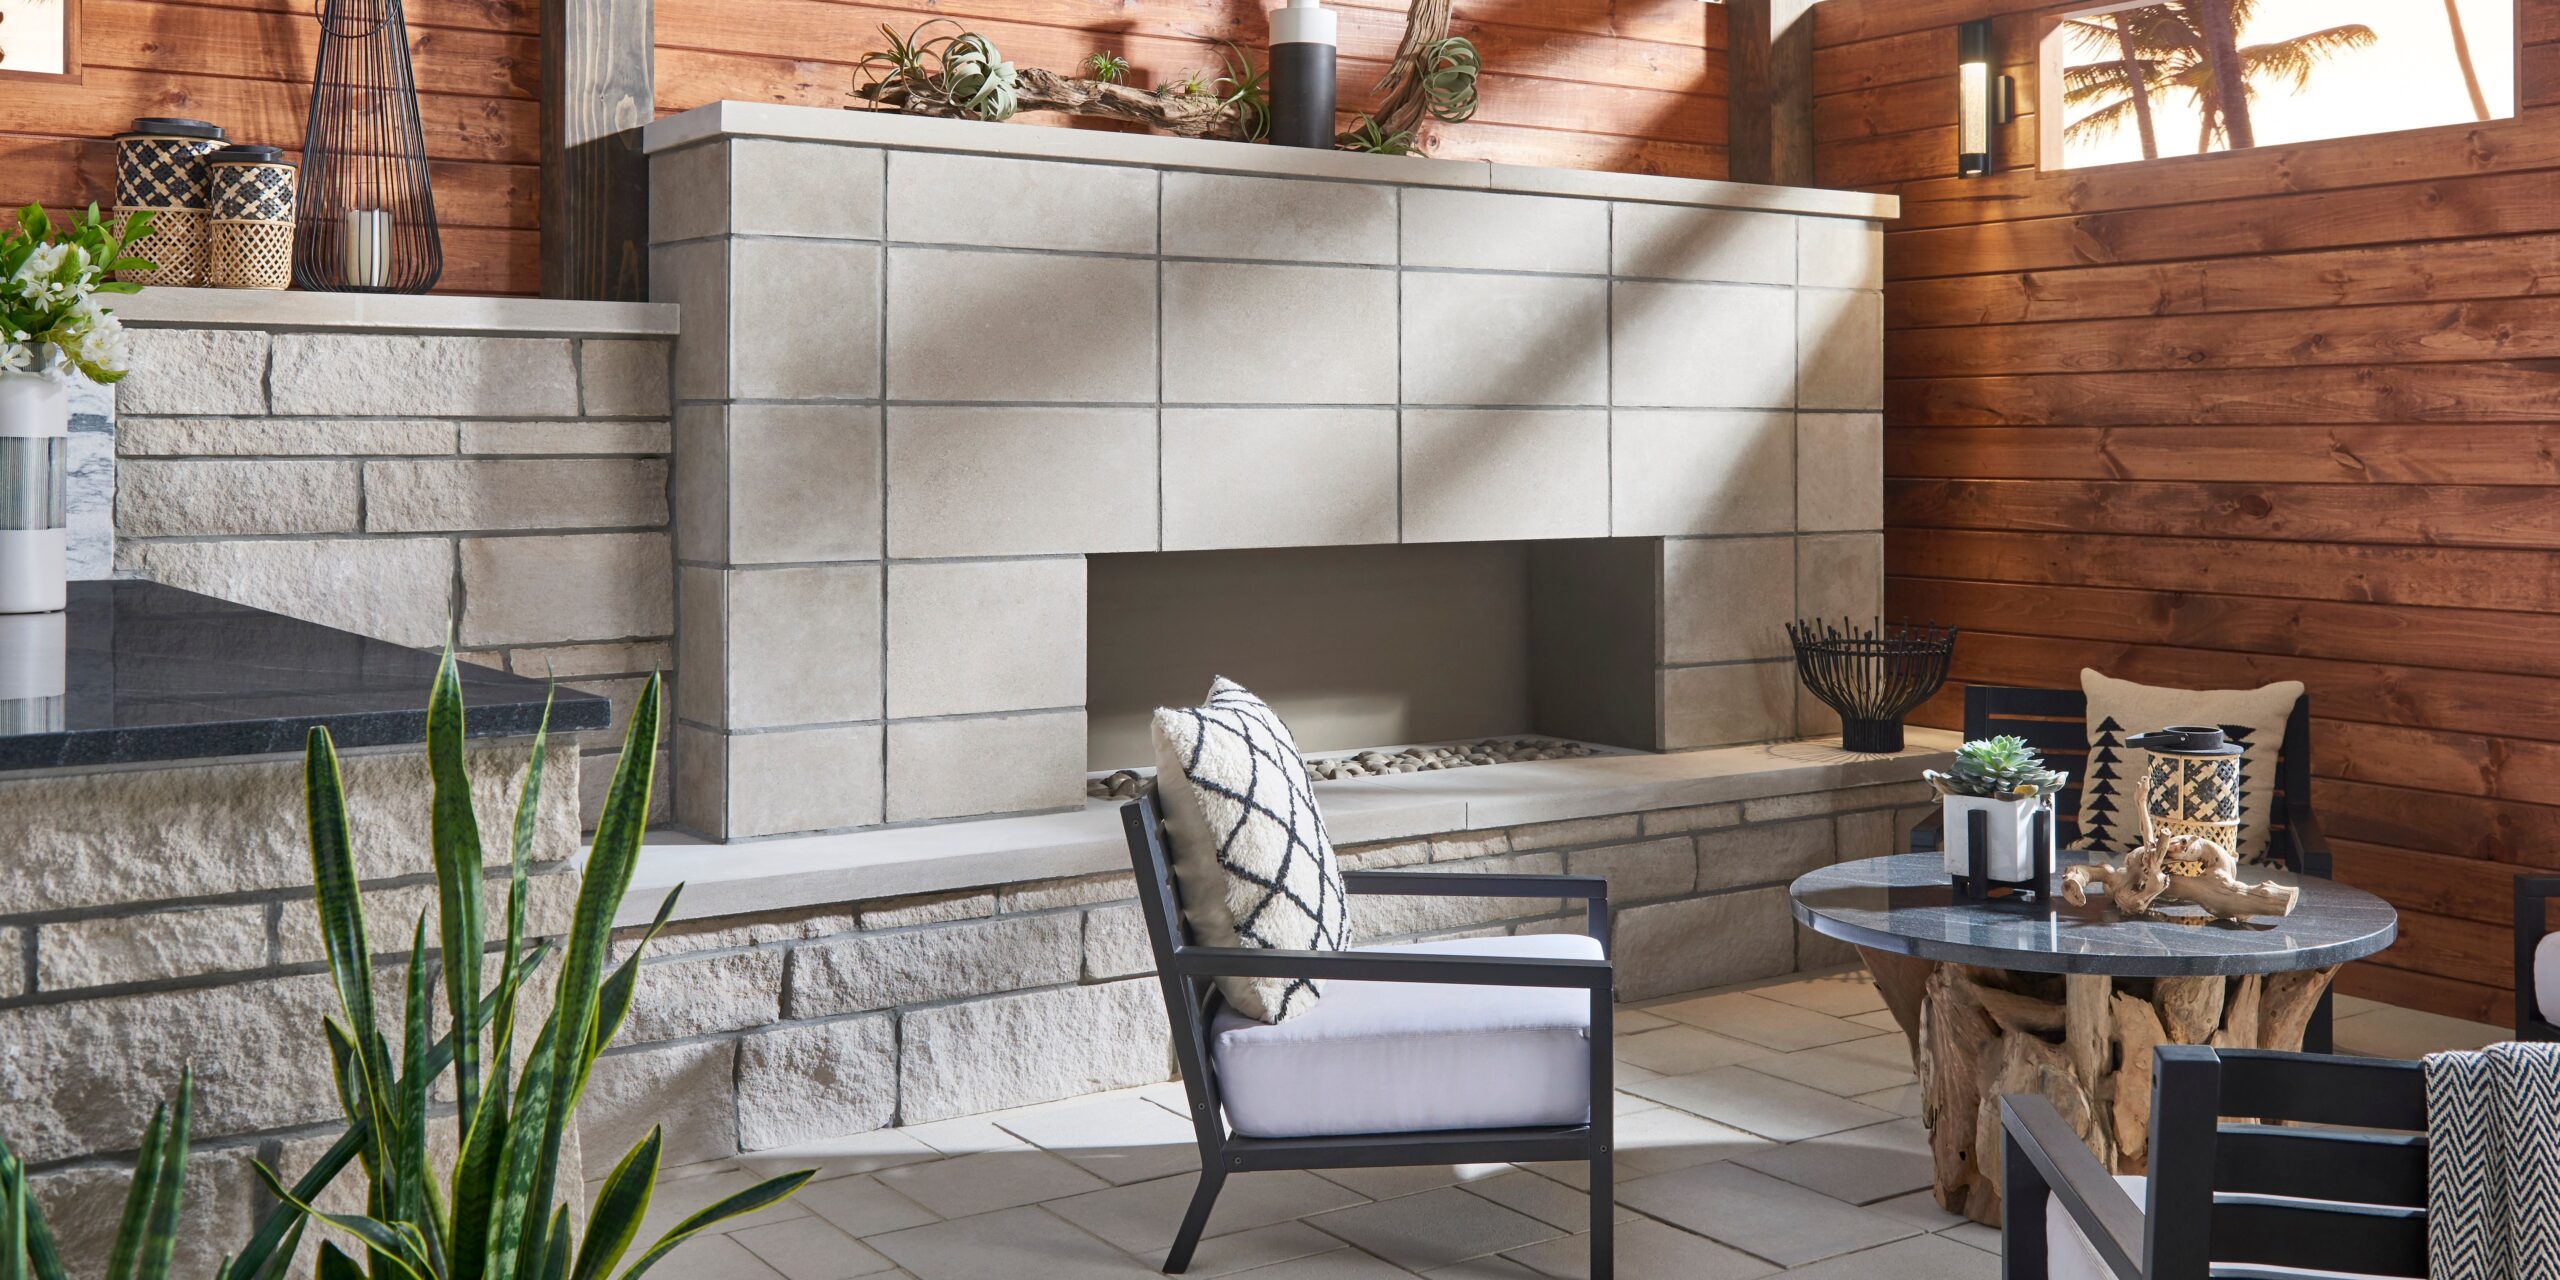
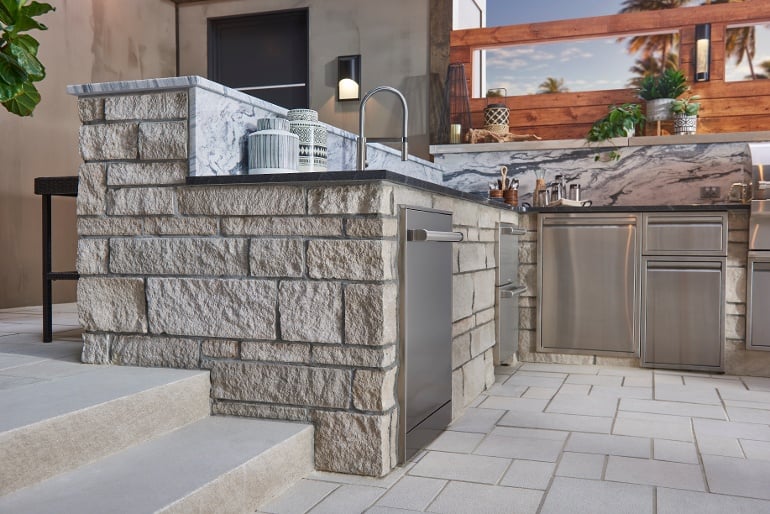
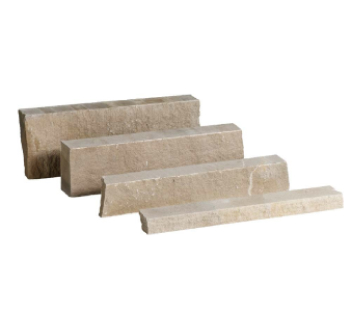
The Berkshire™ is the Estate Veneer Series’ signature ashlar profile. It is a split-face natural stone veneer that strikes the balance between rustic warmth and architectural structure. Four coursing heights (2¼″, 5″, 7¾″, and 10½″) create the layered, staggered rhythm of traditional ashlar masonry, while clean sawn edges keep the overall look controlled and refined. It’s equally at home on an exterior building facade, a grand fireplace surround, or an outdoor kitchen feature or seating wall.
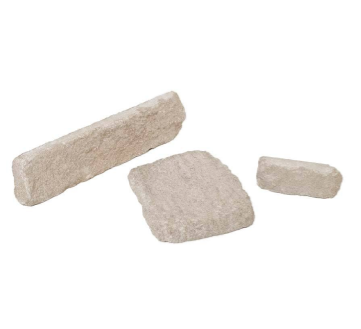
Full Bed Veneer
Thin Veneer Flats
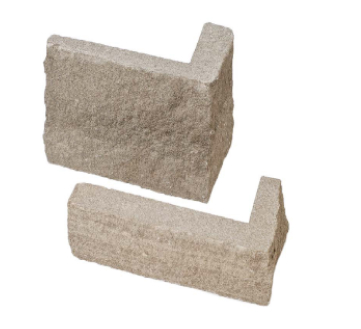
Thin Veneer Corners
The split-face finish is natural and tactile — each piece breaks differently along the stone’s natural cleavage planes, meaning no two stones (or installations) are identical. Available in Indiana Limestone, North American granite, and Georgia marble, Berkshire captures the geological character of each stone species in a way that smooth or thermal finishes do not. The full color blend limestone, in particular, showcases the warm, variable toning that Indiana Limestone is known for.
Thin veneer flats and corners ship in pallet mixes designed to replicate authentic coursed ashlar layouts. A 4-size mix (10% 2¼″ / 35% 5″ / 40% 7¾″ / 15% 10½″) provides maximum visual variety; a 3-size mix (15% 2¼″ / 40% 5″ / 45% 7¾″) is available where the 10½″ course is not specified. Polycor’s stone veneer coursing patterns guide shows how to achieve a variety of different veneer layouts so you can choose what best suits the design.
Rockford Estate Blend™
Freeform Range. Rustic Presence.
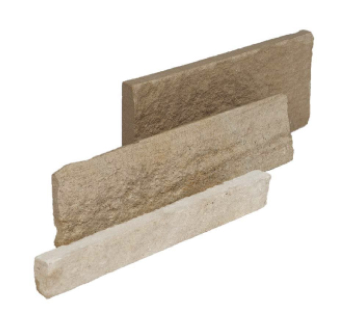
The Rockford Estate Blend™ is the most organic and expressive profile in the Estate Veneer Series. Where Vanderbilt is modular and Berkshire is coursed, Rockford embraces irregular, freeform stone shapes with heights ranging from 2″ to 12″. This randomness creates the kind of naturalistic, hand-laid masonry aesthetic associated with historic estate architecture and rugged outdoor environments. No two sections of wall will look the same, which is precisely the point.
Thin Veneer Flats
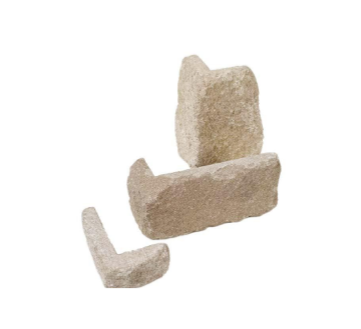
Thin Veneer Corners
Full Bed Veneer
Rockford is the right choice when the design intent is to evoke age, permanence, and craftsmanship. It works exceptionally well on lodge-style residential exteriors, retaining wall accents, garden feature walls, and fireplace surrounds where a more formal coursed look would feel out of place or too rigid. The broad height range (2″–12″) gives installers the material to build layouts that feel genuinely random, deeply textural, and most importantly, personal.
A practical advantage with Rockford is that each piece of full-bed veneer can be used as a corner, simplifying ordering and reducing waste on projects with significant corner runs. Full-bed depth ranges from 3″–5″, providing solid substrate adhesion for demanding exterior applications.
Reduce Costs, Simplify the Project
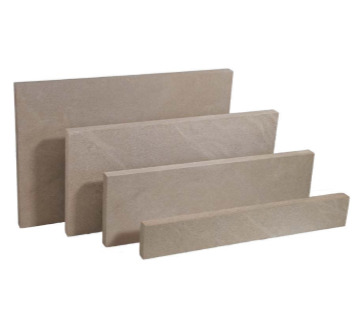
Thin stone veneer can be installed over a variety of solid substrates including CMU’s, cement backer board or even existing masonry, which can eliminate the challenge of removing the original brick or block underneath. The limestone is cut thin at 1-3/16″, but still maintains the authentic look and feel of a thicker stone without the heavy weight of a 3 to 6-inch deep full bed veneer, making installation fast and simple.
As an example, let’s look at one method of installing an exterior fireplace, below. While full dimension stone masonry could require a base or foundation structure as deep as 4 feet into the ground, with thin natural stone veneer, you can build right off a wood floor because it’s bonding to the actual structure and not bearing as much weight on the floor. Not only does this reduce costs and simplify the installation process, but it gives contractors the flexibility to create a natural stone design with almost any limestone fireplace in a home or in the backyard. Another way to increase efficiencies and yield is by using Polycor’s stone veneer calculator to estimate square footage and pallet quantities for your project.
Installing Indiana Limestone Thin Veneers
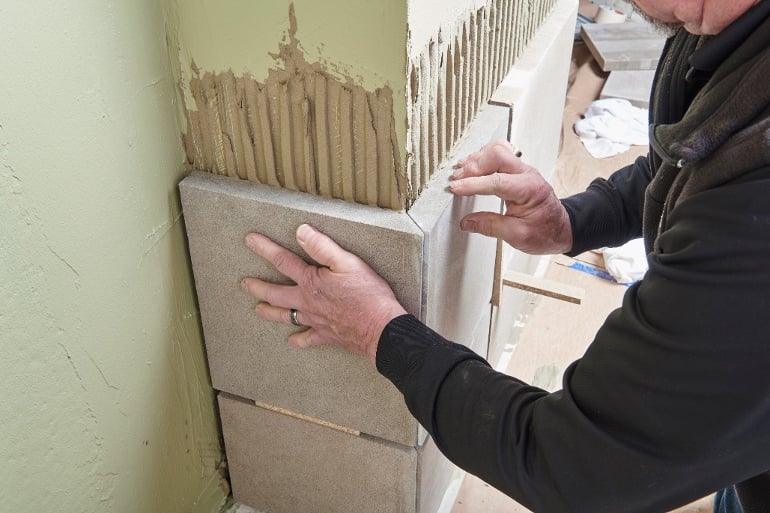
The thickness of the thin stone veneer makes it quick and easy to install. With the variety of polymer modified setting materials available at local building material supply centers, companies like Laticrete have done a great job at R&D and testing their products. In this installation, we’ll be using Laticrete MVIS (Masonry Veneer Installation System) for the mortar.
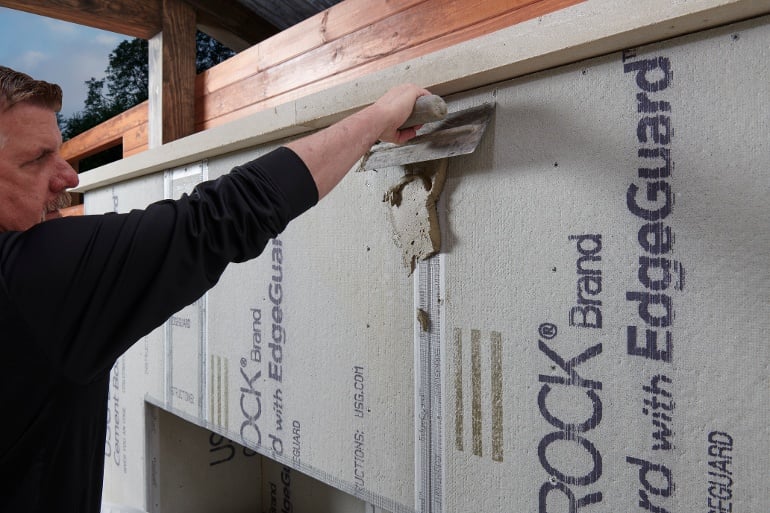
SUBSTRATE & PREP
Starting with cement backer board glued and screwed to exterior grade sheathing with fasteners set at a proper depth, adhere mesh tape to all seams, overlapping at the joint intersections. Mud the mesh-taped joints with mortar and trowel off the excess for a smooth and even surface.
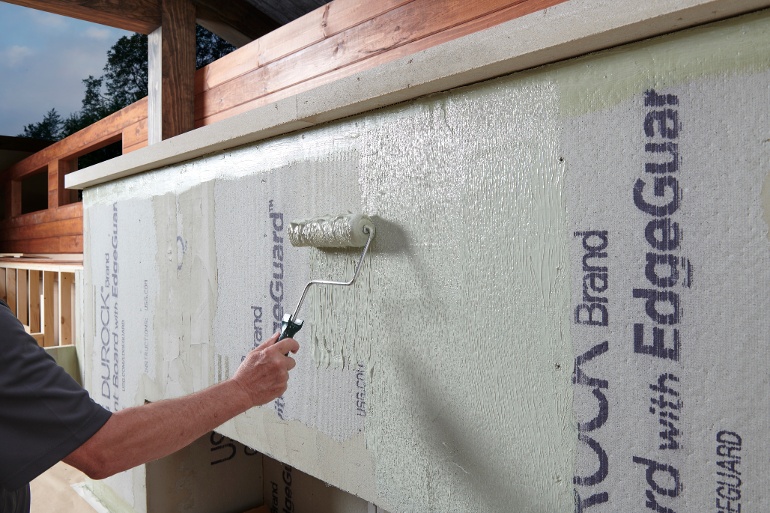
WATERPROOFING
Roll or brush on an approved waterproofing membrane (in this case MVIS Air & Water Barrier) using a 1/4″ – 1/2″ nap roller, applied in 2 coats, allowing the first coat to dry before applying the second coat. Once the membrane is dry to the touch the veneer installation can now begin.
Steps To Install Estate Veneer Series Thin Veneer:
- Mix mortar with water to desired consistency per manufacturer’s recommendations (in this case MVIS Veneer Mortar)
- Key skim coat of mortar to cement backer board approx 1/2″ to 3/4″ thick using the flat side of a trowel. Using a 1/2″ x 1/2″ notched trowel (or 3/4″ loop trowel) held at a 45 degree angle, run grooves into mortar.
- Back butter the entire rear of the stone veneer with a thin skim coat.
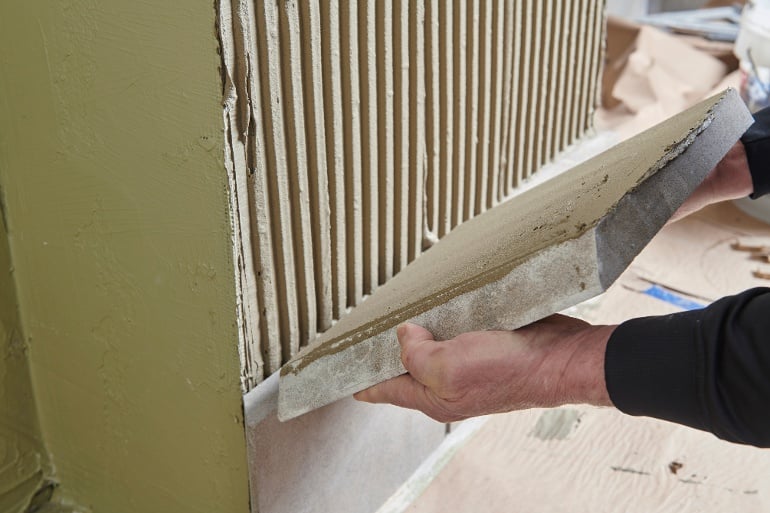
- Install the veneer into the desired location by applying firm pressure, locking it into the mortar bed, and sliding the veneer back and forth slightly into the desired final position. Ensure mortar squeezes out around edges to verify it is adhered properly to the substrate.
- Clean the excess, extruded mortar with the trowel to allow space for pointing the joints.
- Check veneer periodically to ensure 100% coverage by pulling off substrate and inspecting the back for voids per code.
- The final step will be to install the pointing mortar in the desired pre-mixed color to complement the design.
- Mix the pointing mortar to the manufacturer’s recommendation and load it into a grout applicator bag. Apply the mortar into the joint, filling it completely while being careful to minimize smears and droppings onto the face of the veneer.
- Accidental smears or droppings can be cleaned with a stiff nylon brush when dry.
- When the mortar is thumbprint dry tool the joints for the desired appearance.
- Once the mortar is fully cured use a brush to clean off any excess dried material.
That’s it! A simple, straightforward application that instantly upgrades projects from cookie-cutter to custom. Add this knowledge to your toolkit and you’re set up to take on a variety of new projects, enabling you to better serve your customers – and bring in more work.
Different projects, applications and locations will require different methods of installation so be sure to choose the technique best suited for the design. Read more about how to install Indiana Limestone exterior fireplace veneer here.
Veneer Installation Video
See How to Build a Stone Veneer Outdoor Kitchen Using a Mortar Alternative
Comparing the Estate Veneer Series
Not sure which profile fits your project? Use this side-by-side reference to compare the three Estate Veneer styles across pattern type, finish, dimensions, and available stone options. These styles are suitable for a wide range of stone fireplace ideas and will complement any design from modern to classical.
| Vanderbilt Classic™ | Berkshire™ | Rockford Estate Blend™ | |
|---|---|---|---|
| Pattern Type | Modular ashlar (fixed courses) | Coursed ashlar (4 heights) | Freeform / irregular range |
| Aesthetic Character | Refined, architectural, contemporary | Classic, structured, timeless | Rustic, naturalistic, estate-style |
| Surface Finish | Smooth (limestone, marble) · Thermal (granite) | Split-face | Split-face |
| Thin Veneer Heights | 3⅝″ · 7⅝″ · 11⅝″ · 15⅝″ | 2¼″ · 5″ · 7¾″ · 10½″ | 2″ – 12″ (freeform range) |
| Then Veneer Flat Depth | Limestone 1 3/16″ · Granite 1″ · Marble 25/32″ | ¾″ – 1¼″ | ¾″ – 1¼″ |
| Thin Veneer Length | 23⅝″ (fixed) | 8″ – 22″ | 4″ – 20″ |
| Full-Bed Depth | 3⅝″ | 3″ – 4″ | 3″ – 5″ |
| Corner Type | Quirk miter corners (reversible R/L) | Standard corners | Full-bed flats double as corners |
| Indiana Limestone | ✓ Full Color Blend™ | ✓ Full Color Blend™ | ✓ Full Color Blend™ |
| Granite Options | Woodbury Gray™ · Caledonia™ · Saint Henry Black™ (Caledonia & Saint Henry Black™: full-bed only) | Woodbury Gray™ | None |
| Marble Options | Georgia Marble™ – Pearl Grey™ | Georgia Marble™ – Pearl Grey™ (10½″ not available) | None |
| Best For | Contemporary facades, upscale interiors, feature walls requiring dimensional consistency | Exterior cladding, fireplaces, outdoor kitchens, traditional architecture | Lodge-style exteriors, garden walls, rustic fireplaces, naturalistic landscapes |
What Is Thin Stone Veneer
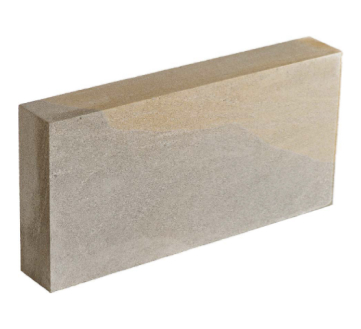
Indiana Limestone is one of the few natural stones that combines workability with structural integrity at reduced thickness. Its consistent grain structure and relatively uniform density allow it to be precision-cut to thin veneer profiles (typically ¾” to 1¼”) without the risk of fracturing that affects more crystalline or layered and stratified stones. It also holds a clean sawn edge exceptionally well, which is what gives the Estate Veneer Series profiles their sharp coursing lines and dimensional consistency.
Indiana Limestone thin veneer is available in three primary finishes through Polycor’s Estate Veneer Series. Split-face finish (used in the Berkshire™ and Rockford Estate Blend™ profiles) exposes the stone’s natural mineral structure for a textural, tactile surface with warm color variation across the Full Color Blend™ range. Smooth finish (featured in the Vanderbilt Classic™) is abraded to a flat, refined surface that reads as contemporary and architectural. The tumbled finish of Rockford Estate Blend™ is applied after the stone has been split first. This tumbling softens the sharp edges of the natural split resulting in a pillow-like effect. All of these finishes are cut from the same quarried Indiana Limestone; the difference is entirely in how the face and edges are processed.
Indiana Limestone has a long track record in cold-climate exterior applications. The stone clads landmark buildings across the northeastern and midwestern United States, as well as Canada, that have weathered more than a century of freeze-thaw cycling. The key performance variable is absorption rate. Indiana Limestone’s relatively low absorption means water infiltration into the stone face is limited, reducing the freeze-thaw expansion risk that affects more porous materials. Proper installation detailing with continuous weather-resistant barriers, adequate drainage planes, and fully bedded mortar with no voids is what determines long-term exterior performance.
All three profiles are available in Indiana Limestone but deliver distinctly different aesthetic results. Berkshire™ is a coursed ashlar profile with four height options and a split-face finish, the most traditional and versatile of the three. It is well-suited to fireplaces, exterior facades, and outdoor kitchens. Vanderbilt Classic™ is a modular profile with fixed dimensions and a smooth finish, designed for projects that require dimensional precision and a more refined, contemporary appearance. Rockford Estate Blend™ uses a freeform height range of 2″ to 12″ for an irregular, naturalistic layout that reads as hand-laid and organic. The stone type is the constant, while the profile and finish determine the design expression.
Yes — Indiana Limestone is an excellent choice for fireplace surrounds. It is non-combustible, dimensionally stable under thermal cycling, and its neutral warm tone works across a wide range of color palettes. For the surround and facing areas away from direct flame contact, any of the three Estate Veneer Series profiles perform well. For areas immediately adjacent to the firebox opening, confirm clearance dimensions with the fireplace manufacturer and verify local code requirements — these govern how close any combustible or decorative material can be placed to the firebox regardless of stone species.
The primary installation difference is in how each stone accepts mortar and responds to cutting. Indiana Limestone is the most forgiving of the three because it cuts cleanly with a standard masonry blade, back-butters readily, and has enough surface porosity to bond well with polymer-modified or Type N mortar. Granite is more dense and has a lower absorption rate, requiring a polymer-modified mortar with higher bond strength and a slightly more critical back-butter technique to achieve full coverage. Marble is less dense than granite, and even though it has a low absorption rate it can be installed with Type N or a polymer-modified mortar formulated for low-porosity stone. In all cases, full mortar coverage with no voids is an absolute requirement, but limestone is hands-down the most accommodating material for installers working with natural stone veneer for the first time.
Indiana Limestone thin veneer works across a broad range of interior and exterior applications. Interior uses include feature walls, stairway surrounds, kitchen and bar backsplashes, wine cellar cladding, and accent columns. Exterior uses extend to entry surrounds, landscape retaining walls, outdoor kitchen cabinet facing, pergola pillars, and full building cladding. The Vanderbilt Classic™ smooth profile is particularly well-suited to architectural ornamentation where a refined, tailored finish is required; Berkshire™ and Rockford are ideal for exterior and outdoor living environments where the split-face texture reads naturally in landscape and garden contexts.
Ready to use natural stone veneer for your next fireplace project? Interested in reading more about Indiana Limestone, America’s Original Building stone? Read more in the Indiana Limestone guide by clicking the button below.